
Article takeaways
- Spring break campsite rates can run half what you’d pay in July, but the best spots are gone 6 months in advance.
- Most RV breakdowns are preventable. A 2-hour pre-departure check is the difference between a smooth trip and a roadside repair bill.
- Towing capacity isn’t one number; it’s four, and exceeding any of them affects your brakes.
- Spring temperatures swing hard. What you pack in the morning won’t be enough by afternoon.
- The reason your RV feels overloaded before you’ve packed for the trip? It probably never got fully unpacked from the last one.
Introduction
You’ve had the trip in the back of your mind for months. The rig is sitting in the driveway (or down the road at the storage facility), the weather is finally warming up, and spring break is close enough to make the plans. Maybe this is your first RV and you finally get to break out and hit the open road! Maybe it’s the first family trip where the kids old enough to remember it.
Maybe you just got back home and you’re already planning the next trip, taking mental note on those things you’d do differently. Either way, there’s something about loading up that RV and steering somewhere new (a national park, a stretch of coastline, a campsite you found on a random forum at midnight). That feeling never gets old. No itinerary carved in stone, no checkout time, no answering emails and phones. No more ‘let’s hop on a quick call.’ Just you, the road, and whatever’s at the end of it.
With the freedom of RVing, there’s also a mental load that comes with it. It’s like a constantly running checklist looping on repeat. “Is the RV actually ready? Did you book the right campsites, or are you going to pull into a campground loop at 7 PM and discover your rig is two feet too long for every available site? Is the truck rated to tow what you’re about to hitch to it?”
These questions have answers, and none of them are complicated once you know what to look for. Whether this is your first RV trip or you’ve done it enough times to have opinions about campground apps, these RV trip tips cover the full picture: planning, packing, towing, and everything in between, so the only surprises on this trip are the good kind.
Why Spring Break Is Prime Time for an RV Trip
The case for a spring break RV trip is pretty obvious: campgrounds are less packed since you’re not hitting peak summer travel season (late June through August), reservation windows that close months in advance are wide open, and nightly rates are more affordable because they’re less in demand.
Taking an RV trip in spring allows you to sidestep most of that. March and April campsite rates at national park campgrounds typically run $20–$35/night for standard sites, compared to $30–$50+ in peak summer. The weather across most popular destinations sits in that productive middle range: warm enough for hiking, fishing, and beach days, cool enough for comfortable sleeping.
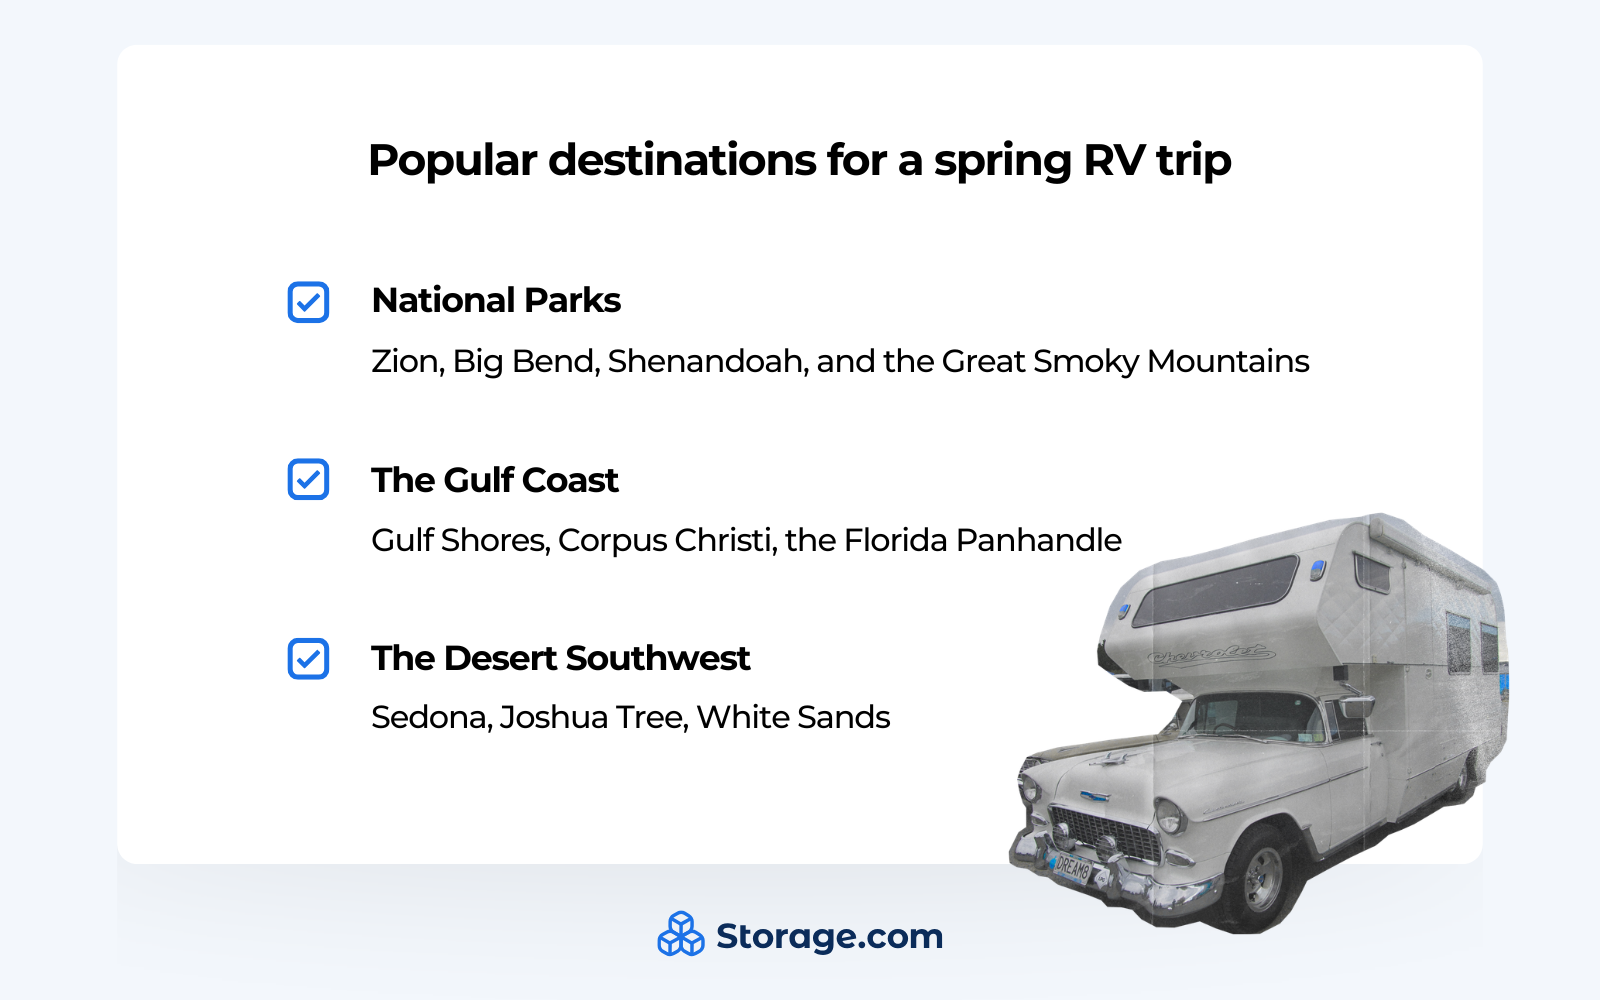
Popular destinations for a spring RV trip include:
- National Parks: like Zion, Big Bend, Shenandoah, and the Great Smoky Mountains (all of which see significantly less congestion before Memorial Day weekend)
- The Gulf Coast: Gulf Shores, Corpus Christi, the Florida Panhandle (all offering drive-up RV camping with beach access and better March availability than any summer month)
- The desert Southwest: Sedona, Joshua Tree, White Sands (The Southwest is legitimately at its best in spring, temperatures are in the 60s–70s°F instead of the 100°F+ of July)
Pro Tip: State parks and Army Corps of Engineers campgrounds are frequently overlooked and often offer hookup sites at $15–$25/night with more last-minute availability than federal sites.
Even though you’ve made it to spring, keep in mind that snow is still possible at certain elevations in March. And the Gulf Coast can see rainstorms without warning. A flexible itinerary isn’t planning for failure; it’s keeping your trip flexible so the weather doesn’t become the entire story of the trip.
Planning Your Spring Break RV Trip
Reservations on Recreation.gov for most federal campgrounds open 6 months in advance. For a spring break RV trip in late March or mid-April, that window opens in October. This is the most common planning mistake most first-time RV travelers make: treating campsite reservations like hotel bookings, something you can handle a few weeks out. At popular destinations, a few weeks out means there aren’t any spots left.
Lock in your campsites first, then build the route around them. Once your sites are confirmed, identify a few walk-up or first-come-first-served backup options along the route. Confirm site-specific details before booking: pet policies, length restrictions, hookup availability, and distance to water and dump stations. A pet-friendly site that’s listed as 40 feet long on paper may not account for tongue length on a fifth wheel.
For route planning and logistics, start compiling a list of tools. Recreation.gov handles federal campground reservations. Campendium and The Dyrt offer user-submitted photos, honest reviews, and cell signal ratings that official listings don’t include.
For fuel cost planning, GasBuddy is worth checking before you finalize your route; RV fuel economy typically ranges from 6–12 MPG depending on rig size and tow setup, so a 1,000-mile trip in a diesel Class A can run $400–$600 in fuel alone. RV Life Trip Wizard is the one tool that standard GPS can’t replicate. It builds routes with your rig’s specific height and weight restrictions factored in, which matters when a road that looks fine on Google Maps turns out to have an 11-foot clearance bridge halfway through.
A week-long spring break RV trip typically runs $500–$1,500+, depending on fuel, campsite fees, and how often you’re cooking versus eating out. Factor in a 15–20% contingency buffer for unexpected repairs, propane refills, and dump station fees. Trips that go over budget usually do so in those small, unplanned increments.
Essential RV Trip Tips Before You Hit the Road
A pre-departure inspection is the kind of thing that feels like optional homework until it isn’t. A thorough pass takes around 1–2 hours and can help you avoid mechanical failures that cost 10 times more to fix on the road than they would in your driveway. For first-time RVers and veteran travelers, it’s the single highest-return hour you’ll spend before you hit the road.
| Check | Pre-Trip Task |
|---|---|
| Start with tires. Blowouts are among the most common causes of RV roadside breakdowns, and most are preventable. | |
| Check cold pressure according to your manufacturer’s specs: Class A and Class C motorhomes typically run 100–110 PSI on rear duals, though your sidewall rating and load configuration determine the exact number. | |
| Inspect sidewalls for cracking or bulging. RV tires age out even when they still have tread, and any tire over 5–7 years old deserves a professional evaluation regardless of how it appears. | |
| Walk the roof before you go anywhere. Seam sealant around vents, skylights, and AC units cracks over winter, and what looks like a minor gap in the driveway becomes a leak during a spring rainstorm. | |
| Reapply lap sealant to anything suspect. Inside, run the water heater and check connections for leaks, test every propane burner, and cycle the refrigerator through a full cooling cycle (it should reach temperature within 8–12 hours). | |
| Confirm the battery bank is holding a charge above 12.4V at rest. | |
| Test the slide-outs and awning for smooth operation before you’re in a campground loop with a car behind you. |
Brakes and fluids are worth a careful check too, even if the rig was running fine last fall. Engine oil, coolant, brake fluid, transmission fluid, and power steering fluid can all drop or degrade during extended storage. Rubber components like belts and hose fittings that show cracking should be addressed before departure, not noted and ignored.
Confirm your RV’s exact height, weight, and length before finalizing the route. Most Class A motorhomes range from 35–45 feet long and 12–13.5 feet tall. These numbers determine which bridges, roads, and campground loops you can actually use. A standard GPS routing doesn’t filter for low clearances or weight-restricted roads; RV-specific navigation does. Keep a card with your rig’s stats in the cab.
For the road itself, pack a roadside kit with a jump starter pack, tire pressure gauge, trailer tire plug kit, basic hand tools, duct tape, a flashlight, and reflective triangles. Always keep your roadside assistance information somewhere accessible; AAA RV Plus and Coach-Net are two of the most widely used plans, with Coach-Net specializing in RVs and covering towing up to 100 miles.
RV Trailer Towing Tips
RV trailer towing is where some of the biggest mistakes can happen. Most of them come down to simply not knowing the numbers before hitching up. If you’re pulling a travel trailer, fifth wheel, or toy hauler, these RV trailer towing tips apply before you ever leave the driveway.
Towing capacity isn’t one singular number either; it’s several. And all of them have to line up. Your owner’s manual lists the specific ratings for your configuration.
Beyond the tow rating, check:
- GVWR (the max loaded weight of the tow vehicle)
- GCWR (the max combined weight of tow vehicle plus trailer)
- Tongue weight capacity (the hitch point load, which should fall between 10–15% of total trailer weight)
- Payload capacity (which is often the actual limiting factor in half-ton trucks once passengers and gear are loaded)
Exceeding any of these ratings doesn’t just risk landing you a ticket if you’re pulled over; it directly affects the brakes and handling of your truck.
A properly hitched trailer sits level or within an inch nose-down when attached to the truck. Tail-heavy loads cause sway; nose-heavy loads overload the tow vehicle’s rear axle. A weight distribution hitch is required for most trailers over 6,000 lbs GVWR and significantly improves handling by redistributing tongue weight across both axles. For trailers over 26 feet or in conditions with high crosswinds, sway control bars or an electronic sway control system are worth adding. Trailer sway escalates fast without a dedicated control system.
Towing can also affect how your vehicle functions. After you’ve become familiar with how your truck and rig move together, this will become more familiar. Until then, it’s important to remember:
- Stopping distance at 60 MPH with a loaded trailer is roughly twice the distance compared to a passenger car. Add at least 3–4 seconds of following distance, more in wet conditions.
- Turning requires more space AND speed considerations.
- Turns that feel normal in the truck require significantly wider arcs with a trailer attached, and the rear swing on right turns in tight campground loops can catch first-timers off guard.
- Most trailer manufacturers recommend a 55–65 MPH maximum: higher speeds increase tire stress and sway risk.
- On long downhill grades, use engine braking rather than riding the brakes; a trailer brake controller is required for trailers over 3,000 lbs in most states and should be calibrated correctly before departure.
If you haven’t towed recently, or if this is a new trailer, spend 30–60 minutes in an empty parking lot before your trip. Practice backing up, backing the trailer is counterintuitive (the trailer turns opposite the direction you steer), and muscle memory takes repetition to build.
Bring a spotter. Extended or aftermarket towing mirrors are going to become essential for any trailer wider than your tow vehicle because standard side mirrors don’t give the best rear visibility. A wireless backup camera mounted to the rear of the trailer can help you remove some of the guesswork on blind backing, which can make solo campsite setup significantly less stressful.
Once the towing part of the RV trip clicks, it becomes routine. Getting there just requires some intentional practice before you’re doing it on an unfamiliar road at the end of a long driving day.
Packing Smart for an RV Spring Break Trip

Every pound matters in your RV. Overpacking is one of the most consistent complaints among first-time travelers once they’re on the road. The trip you planned feels different when half the first day is spent reorganizing gear that won’t fit or realizing the rig is sitting heavier than you expected. You’ll need a solid RV packing checklist before you take that first trip.
In the kitchen, make sure you stock up for simple one-pot meals rather than trying to replicate your home kitchen. A cast-iron skillet, a camp Dutch oven, and a good chef’s knife will be a great place to start. You can also pre-portion dry goods into labeled bags, which saves space and cuts down on packaging boxes (which are bulky to begin with). It also means dinner takes ten minutes instead of thirty when you’ve just driven 250 miles and the kids are done waiting.
When you pack your clothes, keep the same RV logic in mind: pack what you’ll actually need, do not pack for every possible scenario. Spring temperatures can swing 30–40°F between morning and afternoon, especially at elevation or on the coast, so a layering system covers more ground than a bag full of mid-weight options. A base layer, midlayer fleece, and a waterproof shell handle most of what spring throws at you without taking up half a cabinet.
For outdoor gear, work from what you’ll actually use. Chairs, a folding table, and a fire grate are the basics. If you’re adding bikes, kayaks, or paddleboards via a hitch-mounted carrier, account for tongue weight; those loads add up faster than expected and have to stay within the vehicle’s tongue weight rating.
Keeping the Interior storage organized in your RV can make a big difference in how the rig rides, too. Heavier items belong in lower compartments and over the axles, not in overhead bins. Use stackable bins or soft-sided cubes to keep bays organized and prevent gear from shifting while on the road. Cabinet latches and bungee cords aren’t optional in an RV; without them, the pantry will rearrange itself (most likely all over the floor) on the first sharp turn.
Here’s a quick checklist on what not to bring:
| Remove | Items to Remove from RV |
|---|---|
| Duplicate kitchen tools | |
| Excess canned goods (you can snag additional dry goods at grocery stores along most routes) | |
| Anything that’s been packed under “just in case” without ever actually being used |
After loading, weigh the rig at a truck stop CAT scale (typically $12–$15 per weigh). A surprising number of RV owners find themselves overloaded once gear from multiple seasons has accumulated in the storage bays. Catching it in the driveway beats catching it at a weigh station.
What to Do With Extra Gear and Belongings
If the rig is still over its limit after cutting the obvious candidates, the problem usually isn’t what’s going on the trip; it’s what never came off from the last one. Off-season gear, equipment from a different trip, furniture from a downsized space: that stuff accumulates in RV storage bays and eats into your weight budget before you’ve packed a single bag for spring break. A storage unit can help solve those weight and backup storage situations. For anyone on the fence about whether self-storage makes sense for their situation, load up the RV, weigh it, and ask yourself again.
For equipment that doesn’t travel in the RV at all (a spare trailer, a truck bed topper, large outdoor gear), truck and trailer storage handles oversized items that won’t fit in a standard unit. Outdoor vehicle storage typically runs $50–$150/month; covered and enclosed options start around $100–$300/month, and what RV storage costs varies enough by type and region that comparing options before committing is worth the time.
Pro tip: Not sure where to park the rig when it’s not in use? RV storage options range from outdoor lots to fully enclosed units, and comparing a few before the season starts can save you money and hassle down the road.
Staying Safe and Comfortable on the Road
Most experienced RVers run 55–60 MPH as their typical cruising speed. It’s easier on the tires, fuel economy, and brakes. It also reduces the margin for error in a high-profile vehicle. Making a pitstop every 2–3 hours or 150–200 miles isn’t just good for passengers. The concentration required to manage a large RV, motorhome, or loaded trailer is more taxing than standard highway driving, and that mental fatigue can build up very quickly.
If you’re planning on spending your spring break in the Great Plains or the desert Southwest, you’ll have to keep an eye out for high crosswinds. Gusts above 30–35 MPH are worth treating seriously in a tall-profile RV or with a large trailer; slow down, increase following distance, and pull over if conditions don’t improve. A broadside gust can push a Class A several feet out of its lane faster than most drivers anticipate.
In turbulent conditions like that, you’ll want to make sure all passengers are seated and belted in. Even in the easiest driving conditions, it’s the law in most states, and it’s a basic safety practice. For long stretches with kids, make sure you have plenty of downloaded shows, books, toys, and audiobooks to help keep their attention. You can also make some intentional stops at interesting points, rather than just rest areas, to help alleviate pent-up energy and excitement. Make sure all of your pet kiddos are also secured in a crate or with a crash-tested harness while the vehicle is moving.
Making the Most of Your Destination
This is what the planning, the inspection, and the careful loading are all for. An RV trip gives you a home base in the middle of wherever you actually want to be, with no checkout time, no repacking, and no figuring out where you left the chargers.
You’ll also want to time your day to arrive at camp before dark. Setting up, leveling, and connecting hookups in daylight takes 20 minutes. And it’s relatively safer to do so. Doing the same things after dark takes considerably longer, and it’s considerably harder in the dark. Once you’re parked, make sure to use wheel chocks and a bubble level to confirm you’re within the 1–2 degree tolerance most RV refrigerators require to function properly. If you’re still deciding where to store your RV between trips, that’s a separate decision worth sorting before the season starts.
Once you’re set up, campsite safety takes about five minutes and is worth every one of them. A fire extinguisher belongs near the door, not buried in a storage bay where it takes two minutes to find during the wrong kind of emergency. After connecting external propane tanks, check the fittings with a soap solution: bubbles mean a leak, and that’s a problem you want to find before dinner, not during it.
Make sure you keep the pathways clear between the rig and neighboring sites, use outdoor lighting after dark, and lock cargo bays when you leave camp. In bear country, scent control is extremely important. Keeping your cargo bays sealed and secured, including anything with a scent: food, trash, toiletries, and pet food, will help you avoid accidentally inviting a bear into camp.
Once the rig is sorted and camp is secure, get out there and explore! Campground communities are genuinely useful in ways that travel apps aren’t. Other RVers at the same site know which trails are muddy after recent rain, which sites have a reliable cell signal, where the best local breakfast is, and which roads are worth avoiding. That tired-and-true, lived-in knowledge is easy to pick up at a shared fire ring and pretty hard to find anywhere else.
And spring is so worth leaning into after long winters. Spring means wildflower season in the Texas Hill Country and across much of Arizona, which peaks in March and April. Trout season opens in many states around the same time, and campgrounds along rivers fill up fast because of it. State park junior ranger and naturalist programs run year-round and are low-cost for families. The summer crowds haven’t arrived yet, the weather is cooperative, and the trails aren’t picked over. That combination doesn’t last long.
Pack Smart, Tow Safe, and Make the Most of Spring Break
The trips that stick with you, the ones that turn into stories, the ones the kids ask to do again, don’t happen by accident. They happen because someone did the homework: booked the sites early, walked the roof, checked the hitch, and weighed the rig. That preparation is what buys you the freedom to actually be present once you’re there. No scrambling, no roadside surprises, no arriving after dark to a campsite you can’t figure out in the headlights.
Spring break is one of the best windows of the year to do this. The crowds haven’t shown up yet, the weather cooperates, and the road feels like it’s yours. These RV trip tips exist so you can use that window well and hit the road with the confidence that everything behind you is handled.
If off-season gear, extra furniture, or equipment you won’t use on this trip is competing for space in your RV, clearing it out first makes every step of the process easier. A small storage unit handles more than most people expect, and searching RV storage near you on Storage.com lets you compare pricing, amenities, and availability across facilities in your area to find a space that fits your rig, your timeline, and your budget.


![The Ultimate RV Packing List & Checklist [Printable]](https://www.storage.com/blog/wp-content/uploads/2025/08/shutterstock_2490234073-e1756329334567.jpg)