
Article takeaways
- Conducting a thorough home inspection 2-4 weeks before listing your house for sale helps identify and address issues before buyers and inspectors find them, which can increase your home’s value and sale price.
- Address major red flags like foundation cracks, roof damage, water intrusion, mold, outdated electrical systems, and plumbing problems–these deal-breakers can completely derail a sale.
- Use our complete home inspection checklist for sellers and cover all critical areas like the roof, foundation, siding, electrical, plumbing, HVAC, and often-overlooked spaces like attics and basements before the inspection.
- Remove personal items and clear pathways so inspectors can thoroughly examine your property, and buyers can envision themselves living there.
- Fix major safety and structural issues yourself, but consider offering credits or price reductions for minor cosmetic issues rather than making every repair listed in the inspection report.
You’ve made all the preparations, cleaned your house, and staged it for the homebuying process to begin.
You found an interested potential buyer, but before you can close the deal, a home inspector will decide if the house is safe to sell and assess whether the asking price is fair.
With all the time and money you’ve invested thus far, the home inspection process is a crucial, high-stakes situation. If the home inspector gives you the green light, you can put your house on the market and start the process of selling it.
In some cases, the inspector may assess the value of your property, impacting your asking price.
And if you fail your inspection altogether, you’ll have to invest even more money into the home you’re not planning on living in anymore to fix whatever issues they find.
Then, you’ll have to wait until the inspector is available for a second round.
If only you had an idea of what the home inspector is looking for, so you can do a practice run and fix all the issues long before they get there…
Storage.com is here to help.
This article provides you with a complete home inspection checklist for sellers. We’ll explore what inspectors look for and what to expect from a home inspection as a seller.
We’ll also reveal how to prepare your property for a smooth inspection process, and how renting a storage unit can help you get there.
What to Expect from a Home Inspection as a Seller
On inspection day, home inspectors walk through your house room by room and assess your property’s condition. They’ll identify potential safety, maintenance, and functionality issues and evaluate the overall value of your property.
- Potential buyers often hire a professional home inspector to make sure the house is worth the asking price and that key components like the foundation, structure, roofing, plumbing, HVAC systems, etc., are all functional and safe.
- If the home inspector finds any issues, the seller can save the sale by addressing these issues within a certain period, or by lowering the price so the buyer can pay to have them repaired.
- The final judgment of your home inspector affects both you as the seller and your potential buyers, ensuring the asking price is fair to both parties and that the house and all its systems are up to code.
Understanding what to expect on inspection day is a key advantage, allowing sellers to prepare and address any concerns before the buyer and inspector lay eyes on the property’s condition.
By running through a home inspection checklist for sellers, you can clean and prepare some of the key systems and areas the inspector will target. This not only results in a smooth and fast inspection but can also elevate your final sale price.

Before we get into the actual home inspection checklist, let’s review what to expect from a home inspection as a seller.
Timeline: When Do Inspections Typically Occur in the Homebuying Process?
Home inspections typically happen after a buyer’s offer is accepted but before the closing sale is finalized. An inspection provides the buyer with an opportunity to uncover any hidden defects or issues within the home.
The sales contract usually gives the buyer 7 to 14 days to conduct an inspection and address any findings with the seller.
The final judgment of your home inspector affects both you as the seller and your potential buyers, ensuring the asking price is fair to both parties and that the house and all its systems are up to code.
Duration: How Long Do Home Inspections Usually Take?
The average home inspection typically lasts between 2 and 4 hours. That said, the duration of a home inspection can vary depending on the size and age of the home and the complexity of the systems, components, and build.
Larger or older homes are more sophisticated and may require more time for the home inspector to make a fair assessment.
Details: What Do Home Inspectors Evaluate?
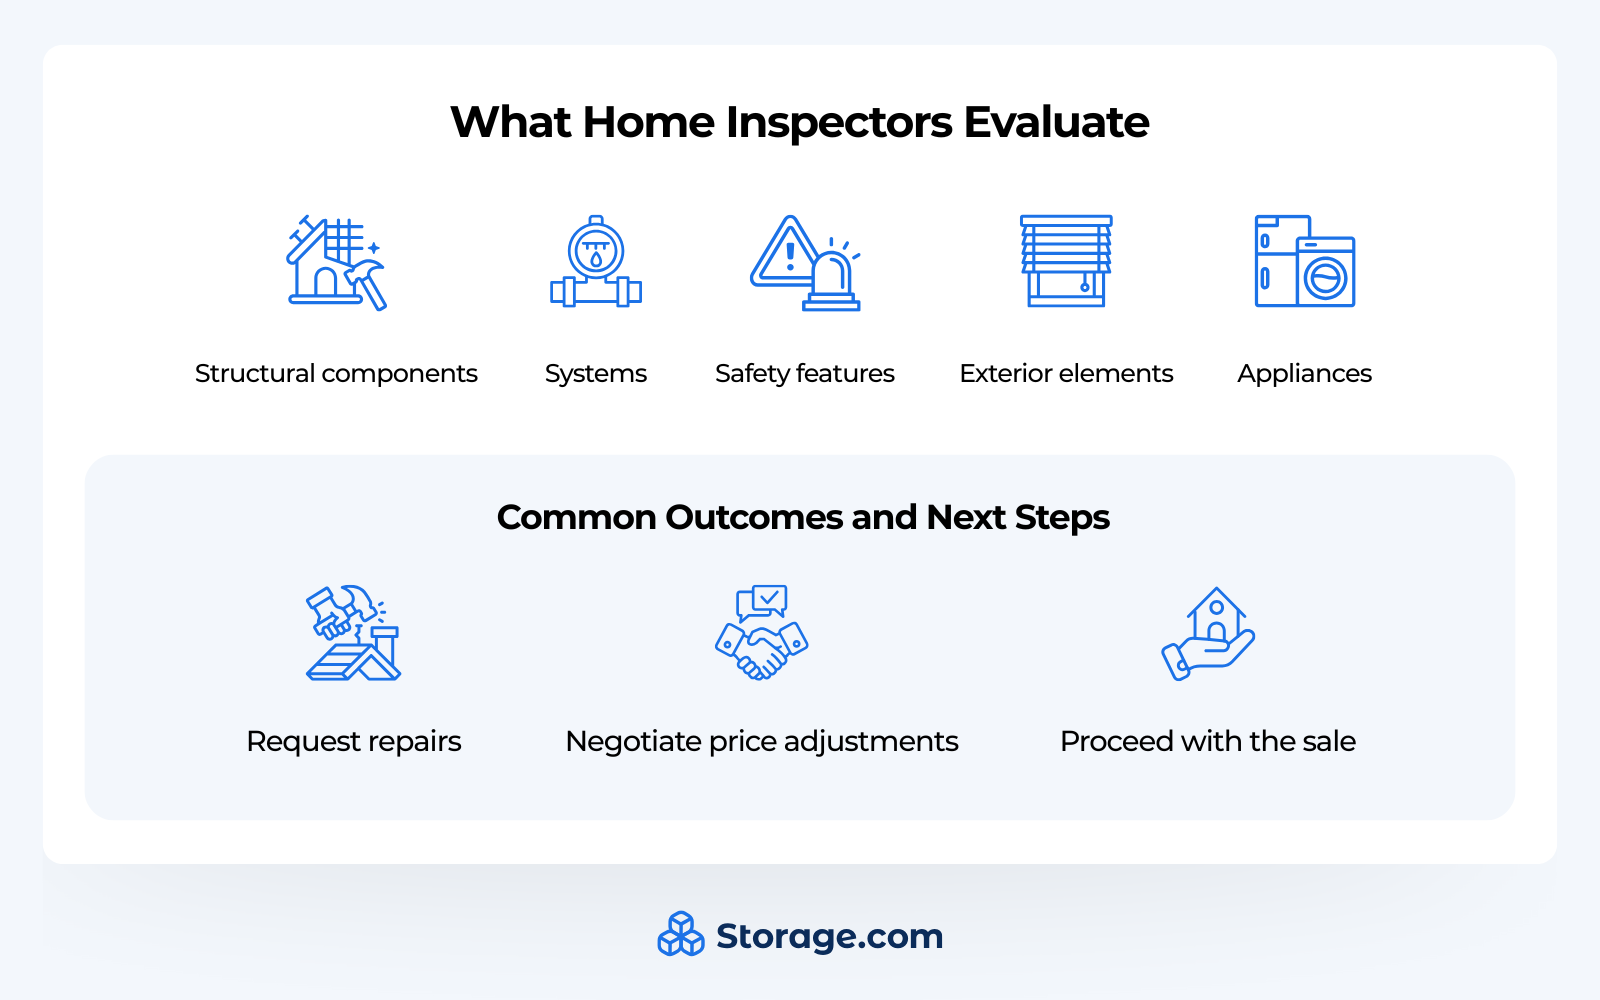
A home inspector’s evaluation will be comprehensive, covering most of the crucial aspects of both the indoors and outdoors of your property, including:
- Structural Components: Foundation, roof, walls, attic, and ceilings for the safety and legality of the construction materials and structural integrity.
- Systems: Plumbing, electrical, and HVAC (heating, ventilation, and air conditioning) for safety, functionality, and potential issues.
- Safety Features: Smoke detectors, fire alarms, and proper ventilation, and whether they meet safety standards.
- Exterior Elements: Siding, windows, doors, and overall condition of the exterior.
- Appliances: Ovens, refrigerators, dishwashers, washing machines, dryers, and any other equipment listed on the sales contract purchase agreement are all part of the home inspection checklist.
What’s the Seller’s Role During the Home Inspection?
As a seller, you can facilitate a smooth inspection process by:
- Making sure the inspector has easy access to all areas of the home, including attics, basements, and crawl spaces.
- Providing any documentation or maintenance records that can support the condition and upkeep of the property and its systems.
- Respecting the inspector’s expertise, staying objective and open-minded about the process, listening to the inspector’s observations, and using the feedback constructively rather than taking a defensive position or insisting on your perspective.
Common Outcomes and Next Steps After Inspection
After the inspection, the findings are compiled into an inspection report, which the buyer and their real estate agent will review. Based on the report, buyers may:
- Request Repairs: Buyers may ask for certain issues to be addressed by the seller before finalizing the closing deal.
- Negotiate Price Adjustments: The buyer may offer to have the issues repaired on their own once they own the property, deducting the cost of the repairs and accounting for the time and effort involved to negotiate a lower sales price.
- Proceed with the Sale: If the inspection report reflects the condition of the house as described in the purchase agreement, the house and its systems require no additional work, and the buyer may choose to move forward without any contingencies.
Understanding and Reviewing Inspection Reports as a Seller
The inspection report is a detailed document outlining the home’s value and condition, along with any defects or issues the house inspector found. The inspector has a duty to be neutral and stay loyal to the facts.
As a seller, you’ll receive a copy of the same report the buyer receives. Review the report carefully and discuss it with your real estate agent. Determine which repair and maintenance requests are reasonable for you to address.
You can always hire a different house inspector to inspect if you have doubts and want a second opinion, but this adds to your overall financial investment in the sale. If the second inspector’s findings match those of the first, you may have to pay for repairs on top of the second inspection, putting you at an even greater loss.
Remember, after both you and the buyer receive an inspection report, you can still negotiate. You can offer to make some of the repairs and ask them to take care of others on their own in exchange for lowering the asking price.
Stay professional and cooperative, and be willing to work towards a solution. This isn’t a battle, it’s a transaction. And all transactions involve compromise.
Pre-Home Inspection Preparation: Getting Started
Getting ahead of the home inspection with some thorough preparation sets you up for a smoother inspection and eases both you and the buyer into the selling process.
We suggest starting your preparation about 2-4 weeks before listing your house, giving you plenty of time to deal with any issues, repairs, or concerns that pop up. By the time you put your house on the market, it’s ready to close.
A pre-listing inspection gives you insight into the property’s current condition, highlighting both its strengths and areas that might need attention.
- Following a home inspection checklist yourself gives you confidence and a reality check that will ease the blow of the inspection report. You know the value of your home based on its verified strengths.
- If you can proactively address any issues found during your pre-inspection and make necessary repairs.
- And even if there are some issues you weren’t able to deal with before listing your property, you can adjust your price on your home and show the buyers yourself, so the inspector doesn’t catch you both off guard.
A crucial part of pre-inspection preparation is gathering all relevant documentation, such as permits, warranties, and maintenance and repair records. Showing this info to buyers and inspectors can help streamline the inspection process and offer them peace of mind and proof that the home has been well-maintained.
You also want to make sure your home is accessible to potential buyers and home inspectors by making all areas of your home easy to navigate.
You don’t want them to think you’re hiding something. And you also don’t want to have to rearrange furniture and clear out cluttered entryways during showings and inspections.
We suggest using a storage unit to help declutter your home before showing it to buyers and the eventual inspection day.
Easier access can help you score a more accurate inspection report. Plus, decluttering and putting personal items in temporary storage to make the place look more neutral helps your potential buyers visualize themselves living in the space.
Exterior Home Inspection Checklist for Sellers
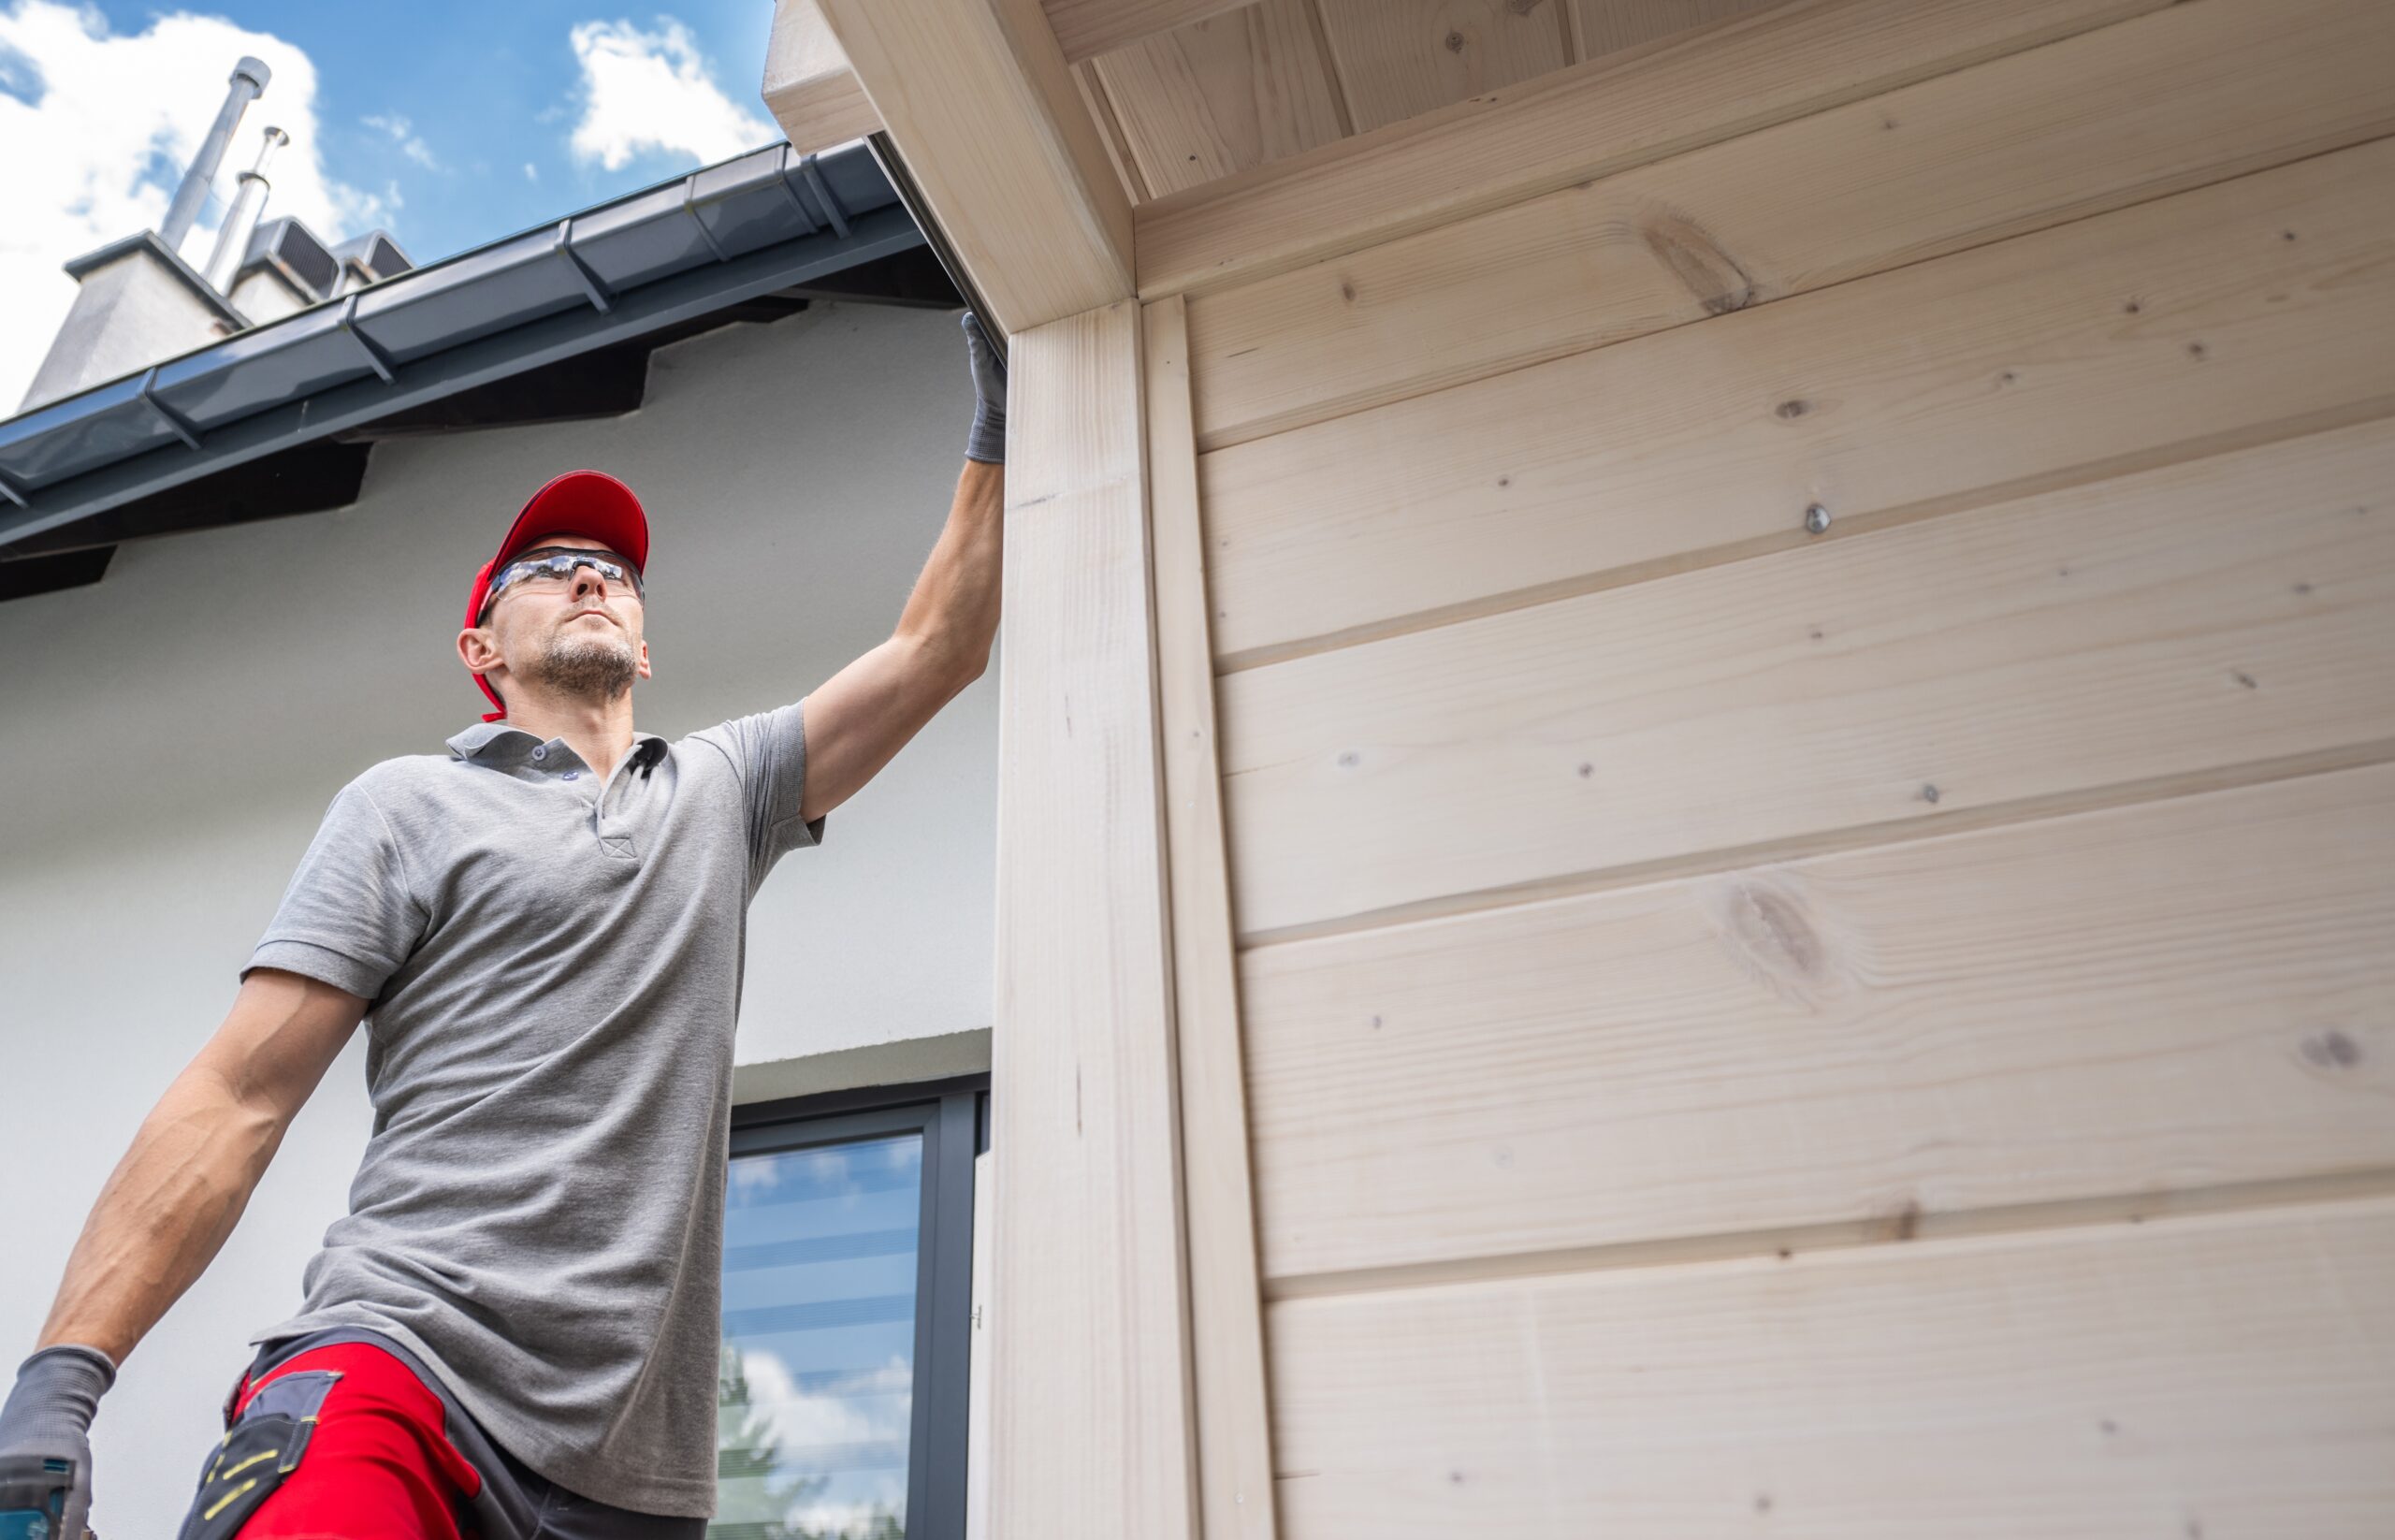
Start by inspecting the outside of your home. Your property’s exterior will be the first thing both your potential buyers and house inspectors see, and it’s a good idea to make a lasting first impression.
Roof and Gutters
- Check for missing, damaged, or worn shingles. If you’re unable to climb on the roof, you can use binoculars and check from the ground.
- Inspect the metal flashing around chimneys and vent pipes to ensure it’s functional and free of damage.
- Clear gutters and downspouts of any blockages and rinse water down them to be sure they’re draining properly and that water runoff moves away from the siding and foundation.
- Check the septic tank for any leaks or unusual smells.
Foundation and Grading
- Check the foundation for any structural issues, including visible cracks, disintegrating materials, or ground settling.
- Make sure the grading slopes away from the house.
- Inspect the foundation and surrounding area for water damage and water intrusion signs.
Siding and Exterior Walls
- Repairing damaged siding, trim, or peeling paint ensures the house is protected from the elements and presents as a high-value home.
- Check the caulking around windows and doors to ensure the house is properly sealed.
- Look for wood rot or damage caused by pests, and be sure pests are deterred from the property before listing.
Windows and Doors
- Ensure all the doors and windows open and close correctly
- Check that the weatherstripping, gaskets, and seals are all intact.
- Replace any chipped, cracked, scratched, or broken glass.
Driveway, Walkways, and Deck
- Fill in any cracks in the concrete and any splits in the wood
- Repair loose or damaged deck boards and flagstone
- Check all railings for stability, tightening fasteners, and replacing compromised wood as needed.
Interior Home Inspection Checklist for Sellers

Once you’ve tightened up the exterior of your home, it’s time to move on to the interior. The inside of your house is the place where your potential buyers will likely be visualizing themselves living, and you’ll want to create a comfortable vision for them if you aim to make a sale.
Electrical Systems
- Test all electrical wiring, outlets, and switches, ensuring they’re functional and safe.
- Check GFCI (Ground Fault Circuit Interrupter) outlets in water-exposed areas like bathrooms and the kitchen to be sure they’re functioning properly and are in compliance.
- Ensure the lighting throughout the house is sufficient, addressing any dark areas as needed.
- Update outdated electrical panels with safety and efficiency in mind.
- Replace any burnt-out bulbs to be sure all lights are functional when showing the place to buyers and home inspectors.
Plumbing System
- Fix any leaky faucets and toilets that run intermittently or continuously
- Check water pressure throughout the house to ensure it meets both functional standards and local plumbing code requirements.
- Inspect under sinks for leaks or water damage, repairing any water-damaged wood before it rots and causes mold, and fixing the leak at the source.
- Test all drains to make sure water flows down the drain at a faster rate than it flows from the faucet and doesn’t start to back up.
- Verify that your water heater is operational and that there are no signs of leaks or standing water, especially around the base. Flush the water heater as needed.
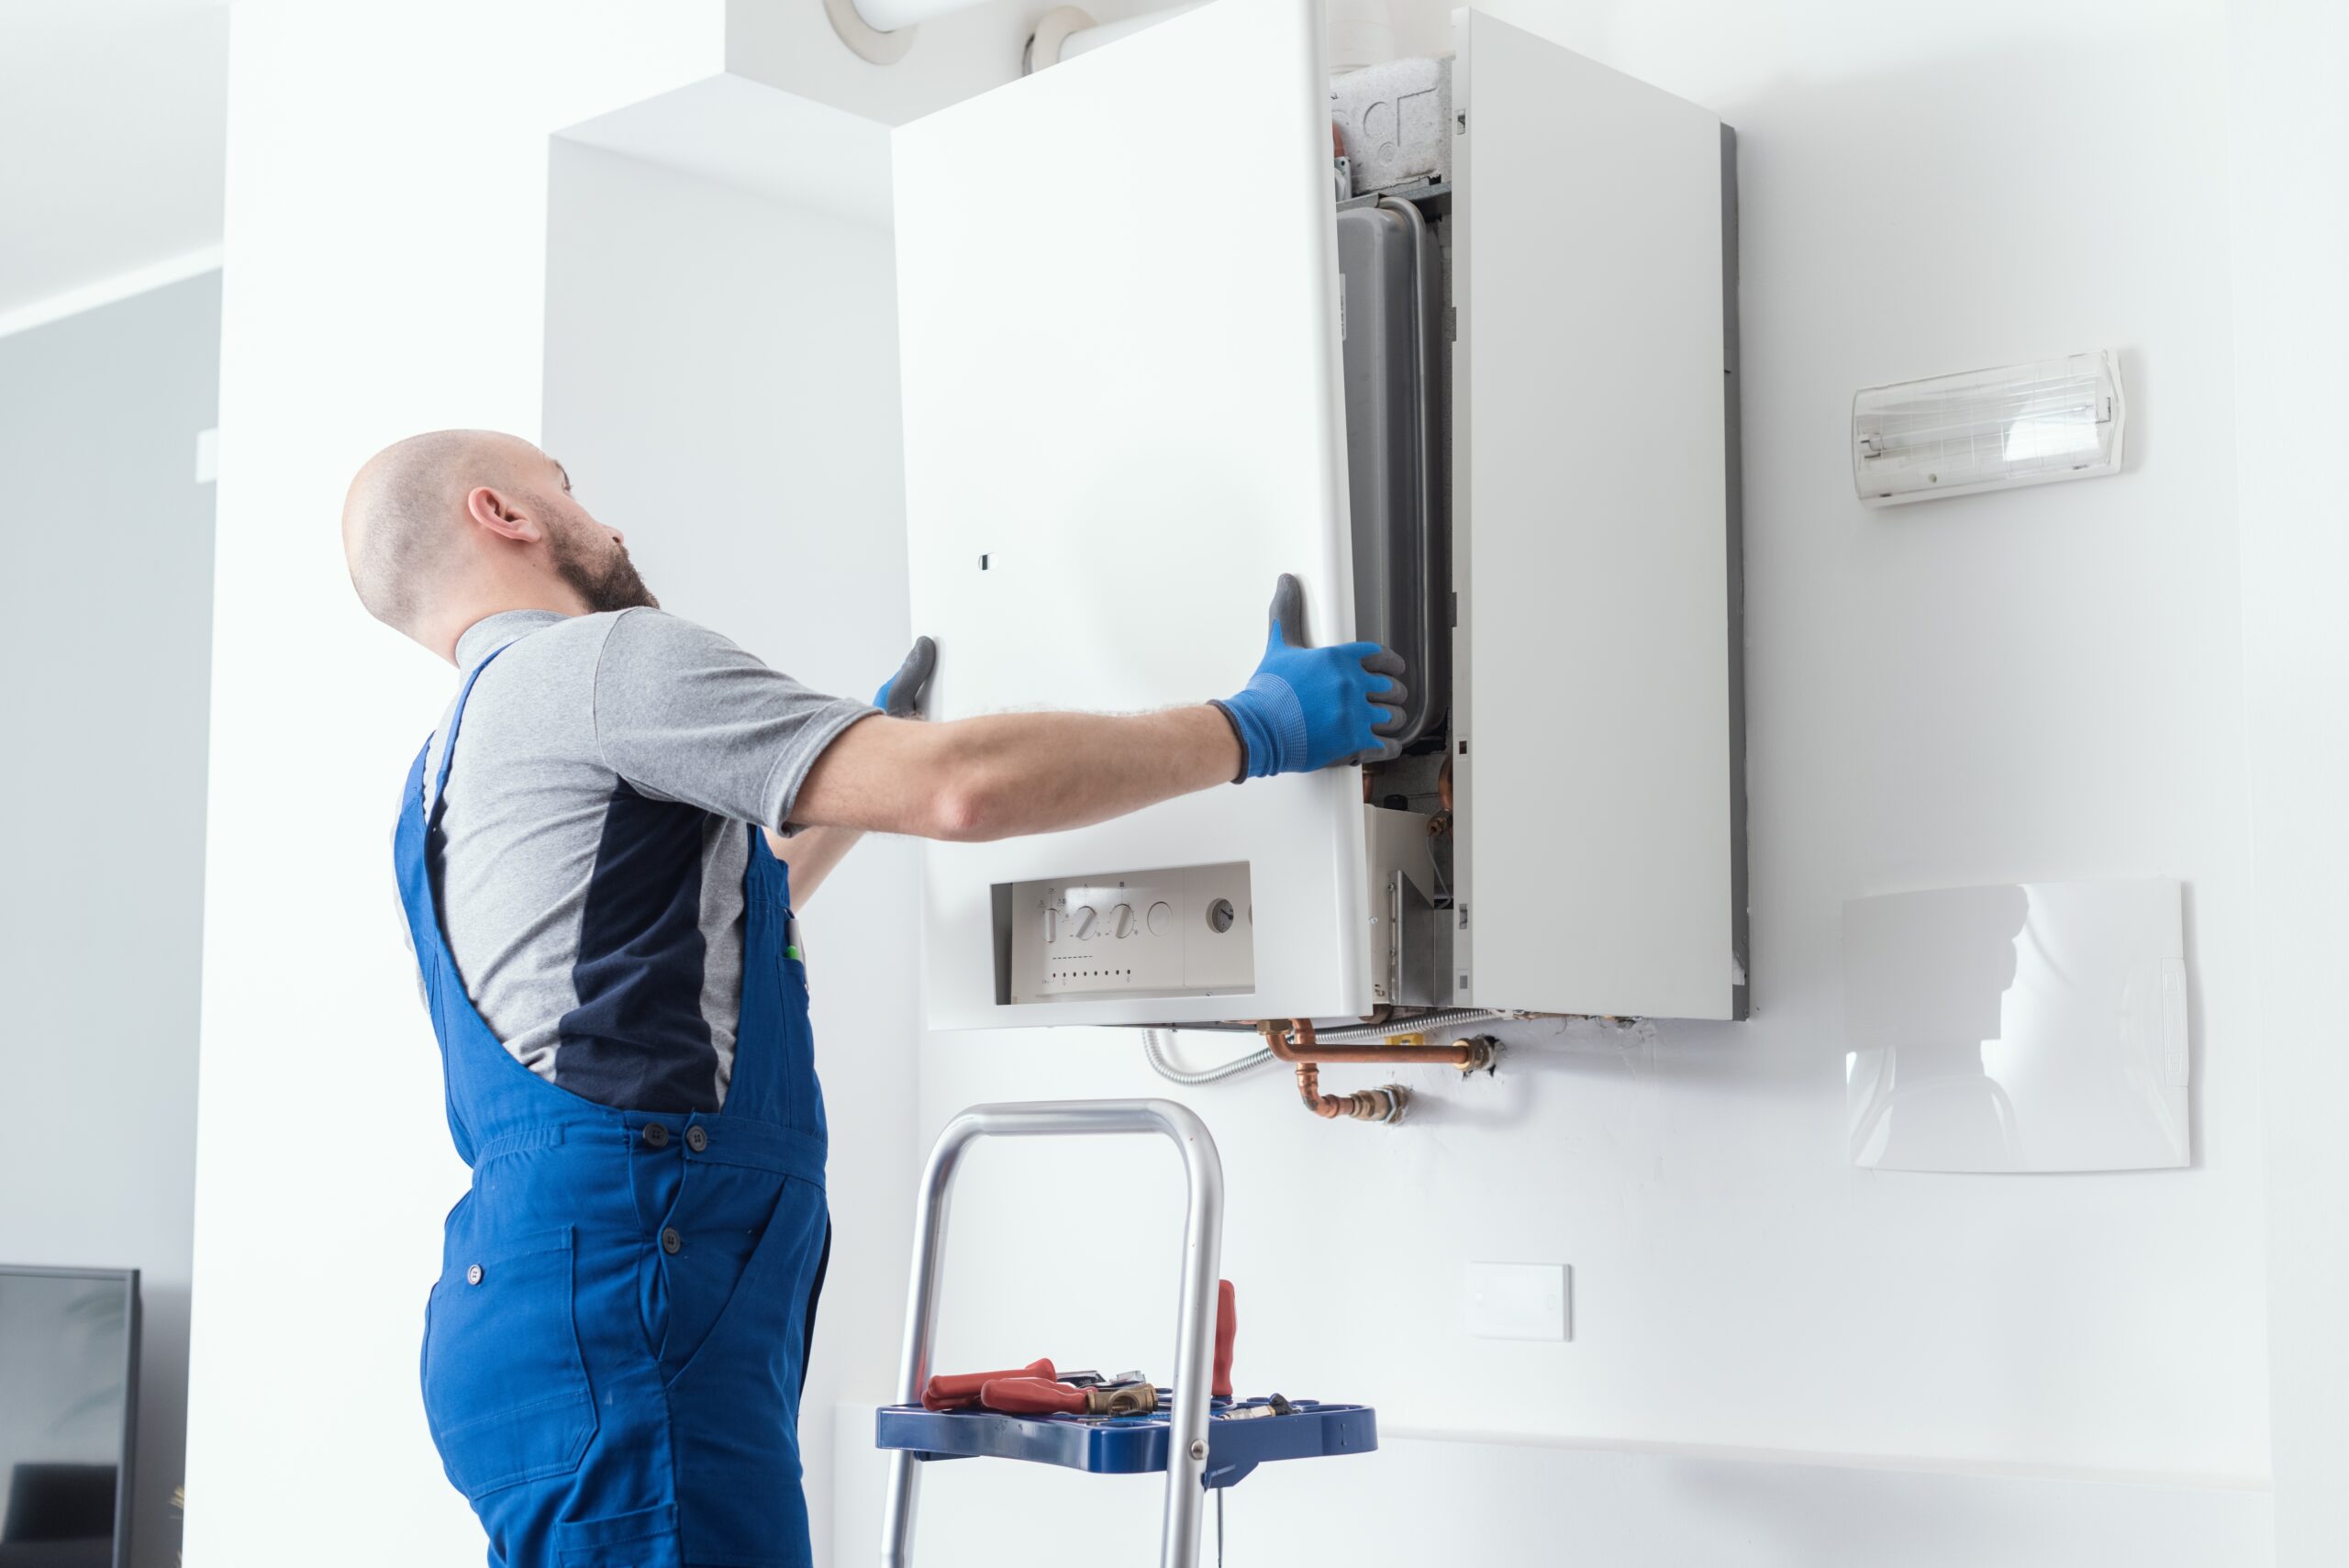
HVAC Systems
- Replace air filters to ensure optimal air quality and system performance on inspection day.
- Schedule service appointments for both heating and air conditioning systems. Keep a record of the service to show on inspection day.
- Clean all vents and registers throughout the home, removing dust and improving the airflow.
- Test the thermostat to confirm that it accurately controls the temperature, calibrating it as needed.
Walls, Ceilings, and Floors
- Fix any holes, cracks, or water stains by patching, repainting, or replacing damaged sections as needed.
- Inspect your wall paint for any chips or fades and apply touch-ups or a fresh coat of paint to areas as needed.
- Fix squeaky floors or loose tiles to be sure all flooring is solid and quiet during your buyer and inspector walkthroughs.
- Inspect ceiling conditions and repair any ceiling damage.
Kitchen and Bathrooms
- Inspect all appliances that are included in the sale agreement, ensuring they’re all in working order and that there are no mechanical issues.
- Inspect the kitchen mechanical exhaust fan to ensure it’s functional and isn’t making unusual sounds like squeaking or grinding.
- Inspect the garbage/food waste disposer, ensuring it’s fully operational and clean and isn’t generating unusual sounds or gaseous odors.
- Check any areas that are prone to moisture and dampness for mold or mildew. If you find signs of mold, we suggest bringing a professional in before listing the house.
- Inspect tiles or grout, fastening any loose tiles and repairing any missing chunks of grout.
Doors and Windows (Interior)
- Oil squeaky Inspect all door hinges and oil any hinges that squeak or lock up.
- Ensure all doors and windows lock properly.
- Check doors and windows for drafts and recaulk or add weatherstripping and gaskets as needed.
Attic and Basement Home Inspection Checklist for Sellers

While your buyers might not ask for a tour of the attic and basement, the home inspectors definitely will. There are some key variables in these hard-to-reach spaces that can make or break a home inspection report score, and the final value the inspector assesses the house is worth.
Attic
- Check insulation levels, thickness, and overall condition, and see if it keeps heat and air conditioning contained.
- Look for roof leaks or water stains that are seeping into the attic area.
- Ensure the attic is ventilating properly, testing all ventilation systems and openings.
- Check for signs of pest infestations or any damage caused by bugs, rodents, birds, etc.
- Declutter the attic, putting stored personal items and clutter into a temporary storage unit so buyers can get a clear impression of the condition and home inspectors can examine structural elements, roof decking, and insulation.
Basement/Crawl Space
- Look for signs of water intrusion, moisture buildup, mold and mildew, or dampness.
- Check the basement and crawl space side of the home foundation and walls for cracks or degrading materials.
- Inspect your support beams and joists for any cracks, rot, unevenness, or shifting.
- If your house has a sump pump, be sure the sump pump works.
- Remove any stored boxes and personal items so inspectors can examine walls, floors, and check for mechanical issues with any of the systems located in the basement. You can get an off-site storage unit or rent a portable storage container and keep your items on your property until the house is sold.
Systems and Safety Home Inspection Checklist for Sellers
Home inspectors will test your safety systems to see how well they’re working and judge the true condition of your house based on the results. For example, if your carbon monoxide detector isn’t operational, how can they be sure there isn’t a carbon monoxide leak in the house?
We suggest staying on top of the following safety systems before listing the house for sale:
- Test all smoke detectors and carbon monoxide detectors
- Check fire extinguishers; replace any expired or damaged ones
- Inspect stairway railings for stability; fix any weak points.
- Ensure proper ventilation in all rooms
- Verify garage door safety features are fully functional
- Check for lead paint or asbestos on homes built before 1978
Common Red Flags Home Sellers Should Address
Like we said from the beginning, you don’t necessarily have to fix all the issues you find before you sell the house. But you may have to adjust your asking price to accommodate any repairs the buyer will have to make, and the home inspector will give their opinions on how well the value of the home matches your selling price.
All that said, some red flags can completely derail a sale for buyers, real estate agents, and house inspectors. Here are a few red flag issues you should definitely address before showing your house to potential buyers or listing it on the market:
Major Issues That Can Derail a Sale
These are the deal-breakers that will send buyers running and flag home inspectors and real estate agents.
- Foundation cracks, roof damage, water intrusion, and mold.
- Electrical problems like outdated wiring, overloaded panels, or aluminum wiring are serious safety concerns that buyers and inspectors won’t overlook.
- Plumbing issues like polybutylene pipes, sewer line problems, or evidence of ongoing leaks.
- HVAC systems that are nearing the end of their life or structural issues like sagging floors or bowing walls.
Moderate Repairs Worth Making Before Inspection
Some repairs fall into a gray area where they’re not catastrophic but still significant enough to make buyers pause and consider other listed houses.
- Leaky faucets, running toilets, or slow drains suggest a lack of maintenance.
- Windows that don’t open, close, or seal properly and doors that stick or don’t latch.
- Cracked or missing tiles, damaged countertops, and unoperational appliances.
- Clogged or damaged gutters can make buyers worry about roof issues.
- Minor electrical issues like outlets that don’t work or flickering lights are inexpensive to repair, but can make buyers wonder what else has been neglected.
Minor Cosmetic Issues and Whether to Fix Them
These are the issues that won’t make the buyers doubt the sale as much as doubt the price. If left unaddressed, expect real estate agents and buyers to use these cosmetic issues as a launch pad for haggling.
- Scuffed paint, small nail holes, and worn carpets. Fresh paint in neutral colors is an inexpensive invesment of the best investments that makes everything look cleaner and more move-in ready.
- Replacing dated light fixtures, cabinet hardware, or faucets can modernize a space without breaking the bank.
- Deep cleaning, decluttering, and minor landscaping improvements help buyers envision themselves relaxing in the space rather than fixing it up as soon as they move in.
That said, you don’t need to go overboard. Major renovations like kitchen or bathroom remodels rarely return their full value in a sale. Cosmetic fixes should focus on making the home look well-maintained rather than brand new.
When to Disclose Known Problems
When it comes to the homebuying process, full seller transparency and honesty are more than just a rewarding practice. In most states, it’s the law.
You’re legally required to disclose material defects you know about, even if you’ve already fixed them. This includes past water damage, foundation repairs, roof replacements, electrical or plumbing work, pest infestations, environmental hazards like radon or lead paint, and any insurance claims you’ve filed on the property.
And if you do manage to sell the house based on providing false or withheld information, any undisclosed known issues can still come back to haunt you in the form of lawsuits.
Plus, you can frame your replacements and repairs as a selling point. A brand new roof with receipts can actually increase your house’s value.
The laws vary based on where you live. We suggest asking your real estate agent about your local disclosure requirements.
After the Home Inspection: Next Steps for the Seller
After the inspection, you’ll receive a detailed inspection report outlining the house inspector’s findings. Keep in mind that a good inspector is being fair to both the seller and the buyer. They’re making sure that the buyer gets the house they think they’re buying in the condition it’s listed in. But they’re also ensuring you get a fair price for your property.
Once the inspection report comes back, take a deep breath and read through it carefully with your real estate agent. Most reports include things that even the most thorough homeowners miss or overlook—that’s the point.
The key is distinguishing between minor blemishes and major concerns that could affect the sale. Your real estate agent can help you interpret which issues are standard wear and tear, and which problems need attention before you can move forward with the sale.
From there, you’ll need to decide what to repair and when to negotiate. Major safety or structural issues are usually worth fixing, while smaller items can be handled through a credit or sale price reduction.
If you’re planning repairs that require clearing out rooms or creating workspace, consider using self-storage to keep belongings safe and out of the way during the post-inspection repair phase. The empty extra makes the work easier for contractors and shows buyers you’re serious about addressing their concerns.
You’re not obligated to fix everything they ask for. Acting professionally and reasonably keeps the deal moving forward. Focus on items that genuinely affect the home’s safety, functionality, or value.
Once you’ve decided which repairs to make, hire licensed contractors and keep all receipts and documentation so buyers can see proof that work was completed properly. It’s up to you and the seller whether you want to conduct a second home inspection once the repairs have been made. Focus on the end goal of reaching the closing sale with both parties feeling excited about the transaction.
Home Inspection Checklist: How Storage.com Can Help You Prepare
By now, you should have a pretty good idea of what to expect from a home inspection as a seller. Getting ahead of the buyers and home inspectors by conducting a thorough inspection yourself before listing your house leads to a smoother sale, a more optimistic inspection report, and a higher home value assessment.
You can download a PDF version of our home inspection checklist for sellers and get started now.
We also covered how important it is to make space for inspectors to give a thorough assessment of the property and for your potential buyers to see themselves living in the place.
Your real estate agent will go over this with you in more detail, but you essentially want to set your house up so it’s furnished enough to be inviting and cozy, but also de-personalized enough for the buyers not to feel like they’re viewing someone else’s living space.
That means removing all personal items and keeping your most neutral decorations and furniture, but nothing more. You basically want your house to be in an open house state as soon as you start showing it.
That said, it’s common for sellers to be living in the place they’re selling up until they close and can drop a downpayment on a new home, be it in the same area or a new city. Renting a storage unit near your house can help you keep your house empty while having all your belongings close by when you need them.
Or maybe you want a unit that’s halfway between your job and your house so you can stop by on the way home from work and rotate through your wardrobe, office supplies, or tools.
You can even keep your maintenance materials in storage during home renovation projects. We suggest keeping your storage unit organized so you can find exactly what you need when you need it.
Plus, a storage unit lets you stage items for your upcoming move. You can start packing, labeling, and organizing your moving boxes in your storage unit ahead of time.
Then, as soon as you sell the old place and find your new home, you simply pull your moving truck up to your storage unit, load it up, and hit the road. Some storage facilities offer deals on trucks or even free moving trucks to their tenants.
When it comes to storage unit prices, the larger the unit size, the lower the price per square foot. That said, the overall monthly price still increases. So if you get an item that’s bigger than you need, you’re paying for space you’re not using.
You can use our storage unit size guide to find out the ideal storage unit size for your needs. Our guideincludes aerial views of all the different size layouts and breaks down common uses for each size.
Some of your personal items, such as furniture, electronics, tools, and sensitive seasonal items, might need climate-controlled storage.
Input your zip code into our Storage.com signature search tool and find a whole list of storage facilities in your area. Our map feature will help you isolate the units that are close to your home. It’s that simple.