
Article takeaways
- By employing strategic planning, uniform stackable plastic bins, and utilizing vertical space and proper packing and organization methods, you can increase usable storage space by 30-50%.
- Create a detailed inventory system with color-coded categories based on access frequency or item category to streamline finding and retrieving items.
- Use uniform plastic bins with secure lids instead of cardboard boxes to prevent crushing, moisture damage, and pest attraction while enabling safe stacking.
- Plan access pathways and storage zones before loading items into the unit.
- Schedule quarterly maintenance sessions to update inventory, swap seasonal items, clean the unit, and prevent overcrowding that damages belongings.
You may be here because you’ve already chosen your shiny new storage unit. Or maybe you’re in the market for one and are brushing up on storage tips for storage units to seal the deal.
Either way, you’re likely asking yourself exactly why proper packing and storage unit organization matters.
Here’s the Short Answer to Why Proper Packing and Storage Unit Organization Matters
Understanding how to pack for storage and employing strategic packing can increase the usable space of your storage unit by 30-50%. Applying storage tips for storage units helps protect your belongings, and proper storage unit organization ensures your stuff is easily accessible as soon as you need it.
But the opposite is also true. There are common storage unit organization mistakes we see over and over again that waste valuable storage space. Storage units come in different sizes, and the larger the unit, the more your monthly rent on it will be – wasting storage space is a waste of money.
And it’s not just the waste of space; packing for storage incorrectly can damage your belongings.
This guide covers the professional packing principles and how to utilize them to maximize your storage space. We’ll cover how to pack for storage, starting with the planning and preparation stages. We’ll cover packing and layout strategies, inventory methods, and how to organize your storage unit long-term.
How To Pack for Storage: Planning and Preparation
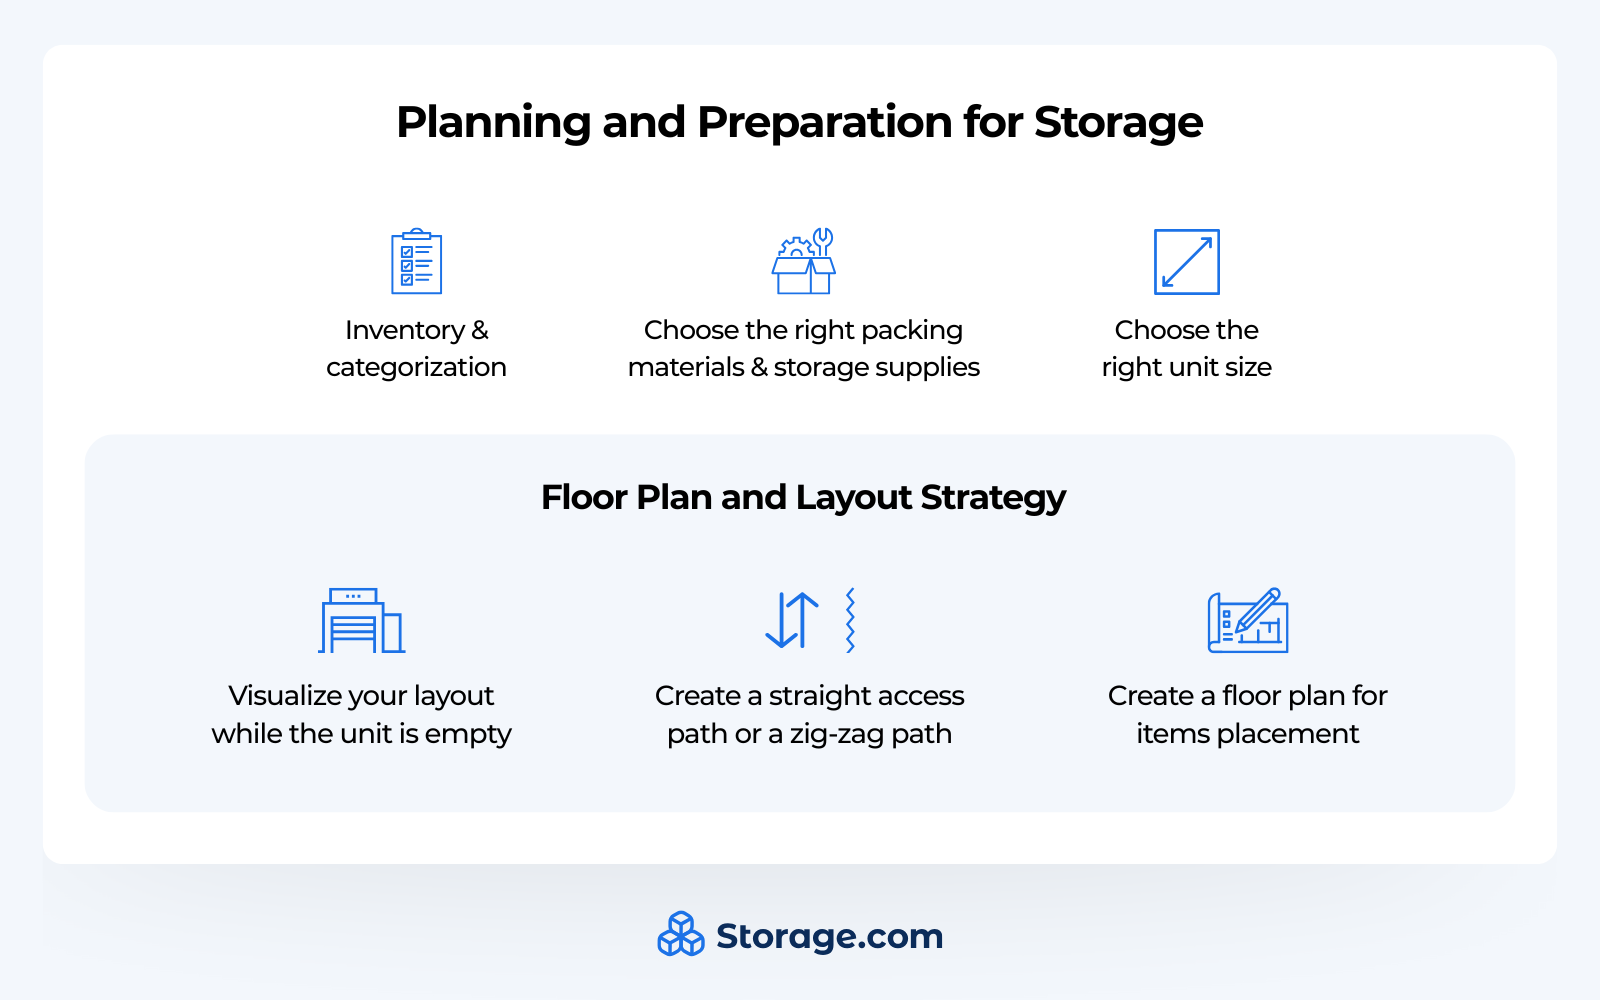
Packing for storage starts with a detailed planning and preparation session. We suggest taking inventory of the items you’re packing as you go and using your inventory sheet to create categories so you can plan your layout. You’ll also need to choose the right supplies and packing materials to keep your goods protected.
Inventory and Categorization
As you’ll soon see, making a complete inventory list of everything you plan to store as you’re packing will save you lots of time down the road.
You can start with pen and paper, just listing everything you’re planning to store as you put your hands on it to get a better idea of its size and shape.
- If you have time, we suggest making a second draft of your inventory list, where you organize the inventory list into categories to make each item easier to find.
- For example, all tools can be listed in the same category, even if you won’t be storing them all together.
- Once we move into the storage unit, we’re going to number all our storage bins, crates, boxes, and shelves, and add the location of each item onto the list next to the item.
- But if you’re looking for a screwdriver, it makes more sense to find it under the “Tools” category, check the bin number next to it, then find the associated bin or toolbox.
- Put the categorized inventory list on a clipboard, as you’ll be leaving the inventory list in the storage unit as your cheat sheet.
- Save a digital copy of the storage unit, which you can access from your phone as a backup.
Once you have all your storage-destined items inventoried and categorized, it’s time to plan out where they’ll go.
We typically recommend placing the items you’ll need to access often in places that are easy to reach. For example, if you ride your mountain bike every weekend, you’ll probably want to keep it by the door.
On the other hand, items you’ll only need to grab once a year, like Christmas decorations or your winter boots, can go toward the back of the unit, or up high on a shelf, etc. Rather than making a whole new inventory list for this step, you can grab a few different color highlighters and create a color code system.
When you start packing up your large plastic bins at a later step, you can start labeling boxes with colored tape that matches the highlighter scheme of all the items inside. When it’s time to stock your unit, green should be the easiest to access, red the hardest, and yellow somewhere in the middle.
The early categorization stage is also a great time to identify any fragile items that may require special storage accommodations or valuable items that need extra security precautions.
Another important category to consider at this stage is seasonal items. You may want to keep all spring sports gear and clothes together so you can easily swap them out with your winter gear and clothing at the end of the season.
Anything that’s going to stay in storage permanently should also be marked down and categorized as such, so you can consider that when mapping out your storage strategy later on.
Choosing the Ideal Packing Materials and Storage Supplies
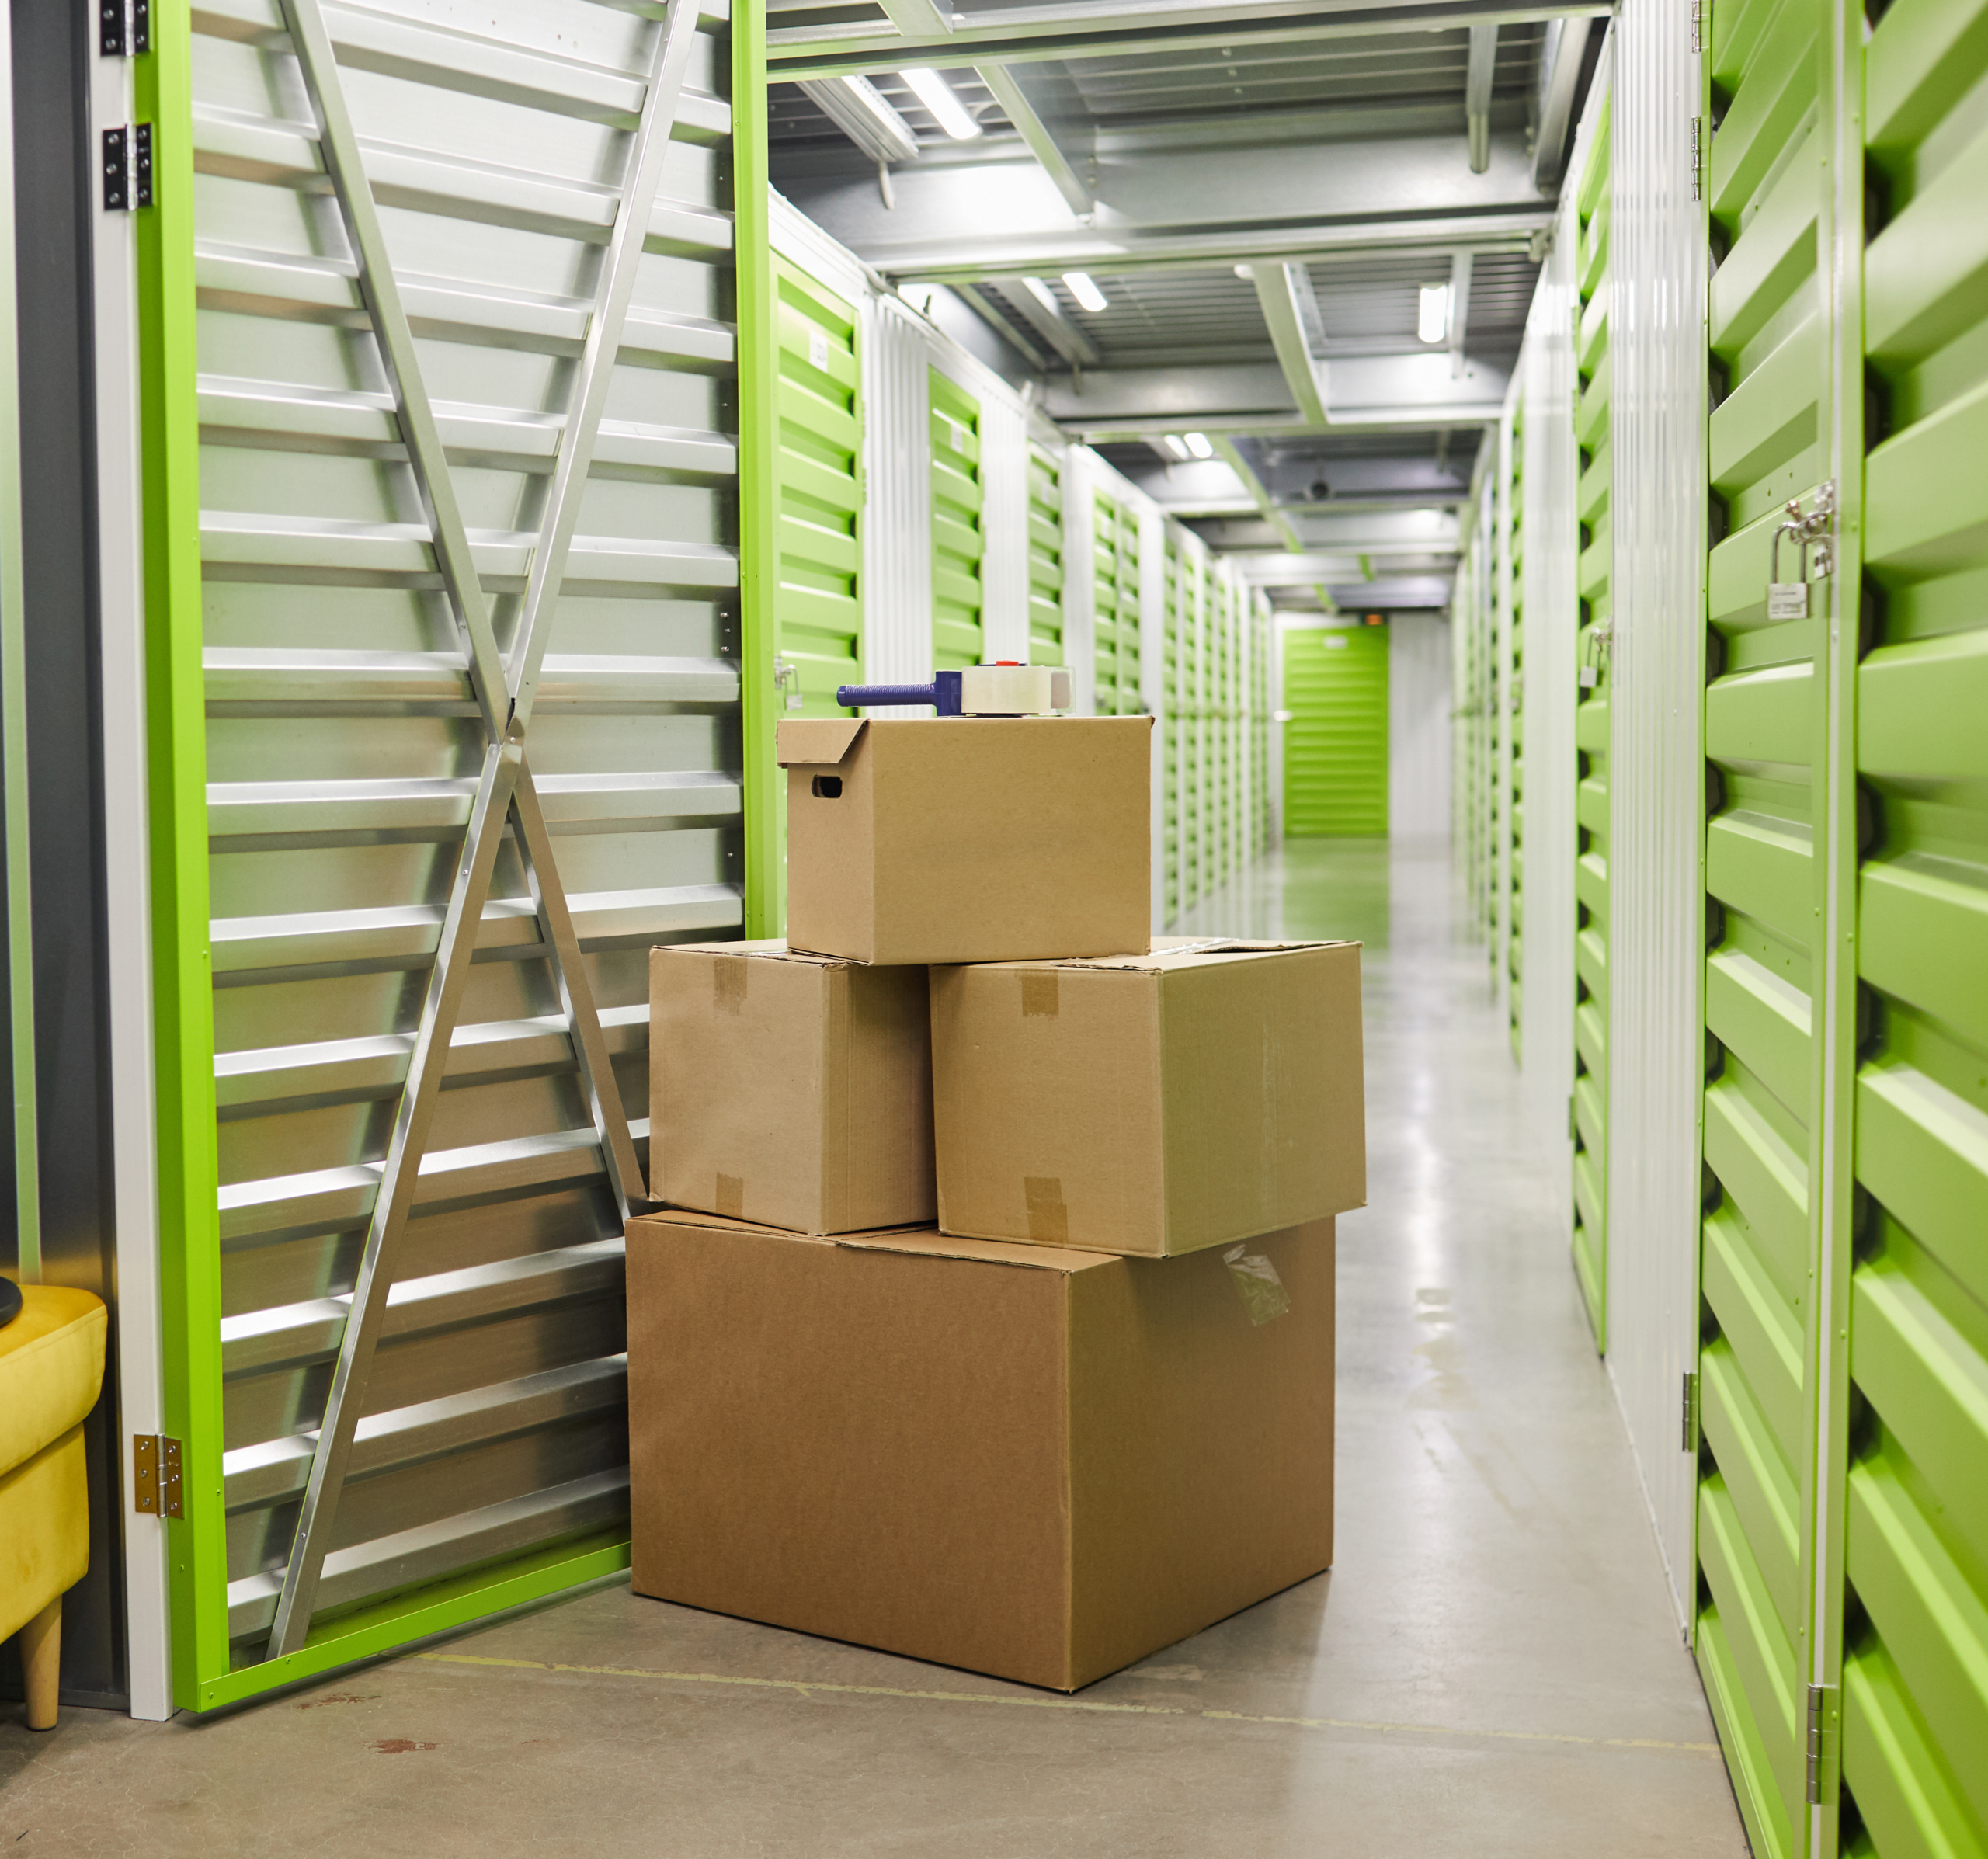
Storage professionals will be the first to tell you that the box types you use matter. Cardboard boxes are certainly the cheapest option, but stacking boxes made of cardboard is problematic. The boxes at the bottom of the stack will get crushed and start to sag, and the whole stack will lean and eventually fall over.
But you definitely do want to take advantage of the vertical space storage units offer. We suggest using uniform plastic bins that are designed for stacking. These not only keep your belongings safer by offering protection, but they also defend against the moisture and pests that cardboard attracts. Throw a silica gel pack inside for extra protection against mold and mildew.
You’ll want to have your packing materials already on deck this early in the game so you can solidify your strategy. We suggest using bubble wrap to wrap fragile items before you put them in the storage container.
When it comes to storing clothes, breathable storage bags and wardrobe boxes with moisture absorbers are both great defenses against mildew and funky smells. You can save lots of space by storing clothes in vacuum-sealed bags, which offer air-tight and waterproof protection.
Lining at least one wall of your storage unit with metal shelving is another great way to take advantage of vertical space. Shelves can hold bulky, stand-alone items like a leaf blower, or you can line them with sealed plastic bins.
Another way to streamline your storage experience is to use storage carts with die-hard caster wheels attached. You can keep frequently accessed items in the cart and wheel them back and forth between your car and your storage unit with ease.
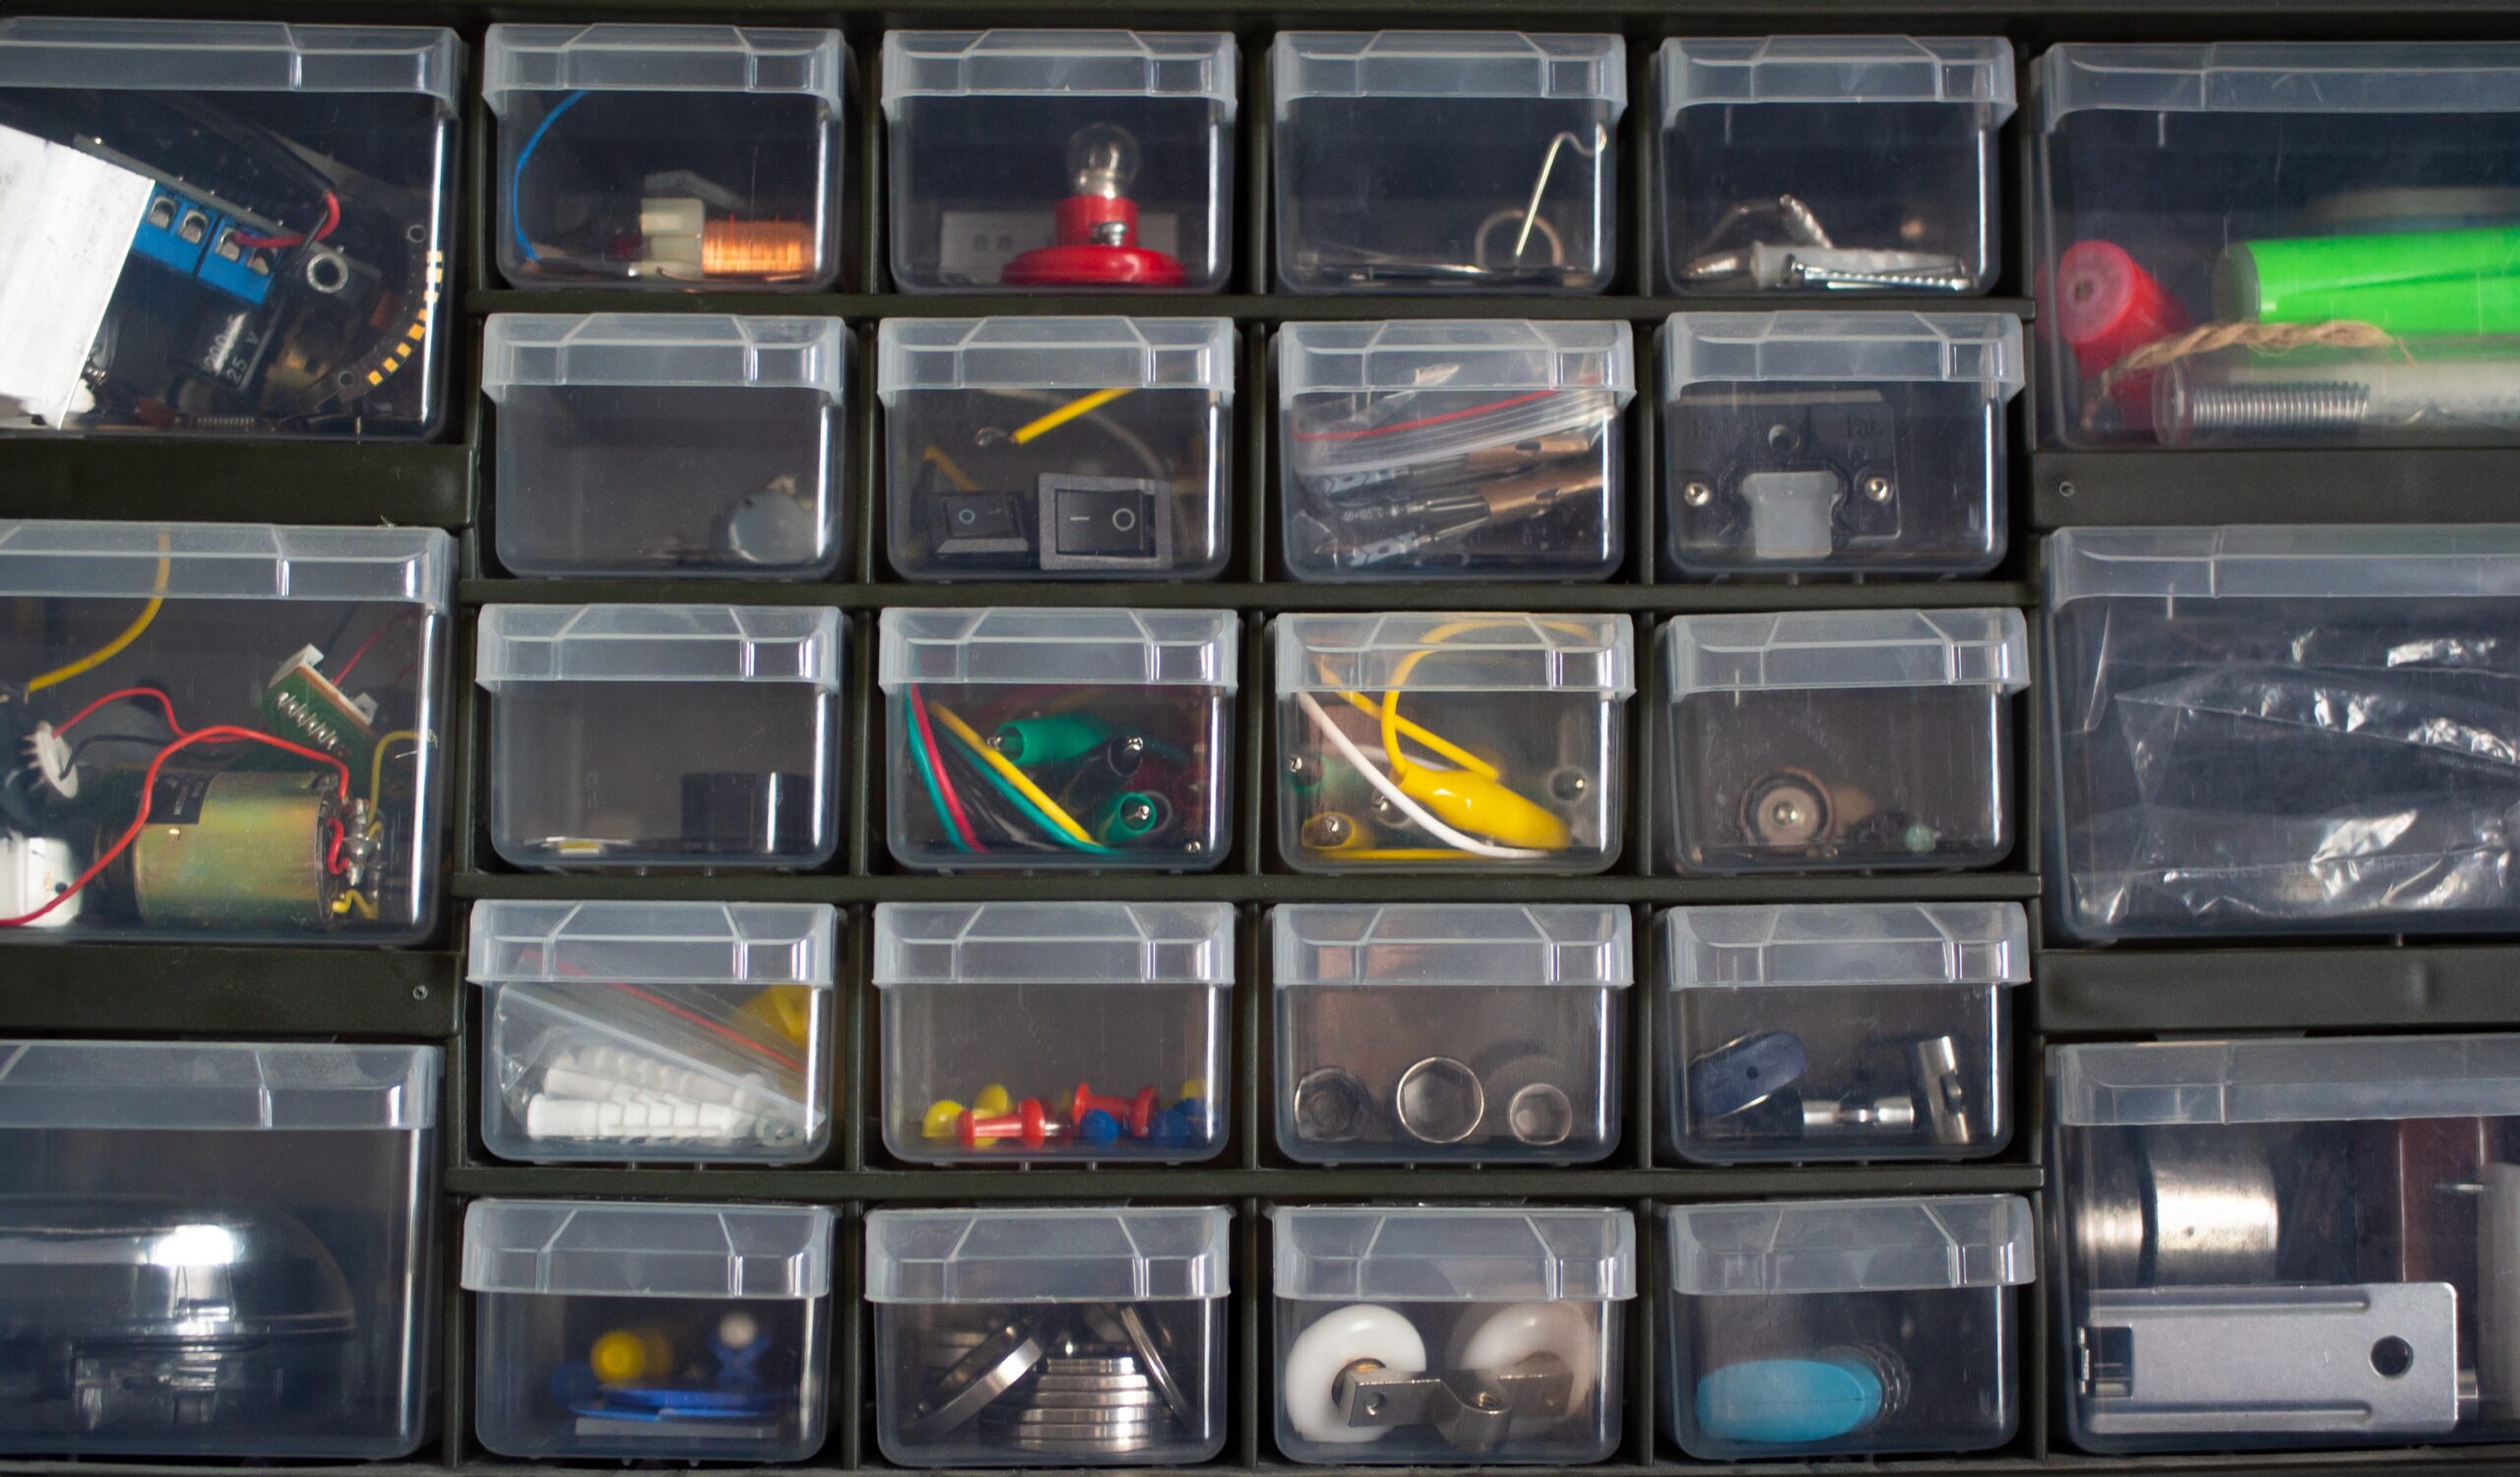
You can use drawer systems with dividers for smaller items, and elevated milk crates or book shelves for collectibles like vinyl records and comic books – never store paper items directly on the ground.
When it comes to labeling tools, we already mentioned color-coded tape to correspond with your highlighted inventory list. You’ll also need a magic marker.
Another enabling strategy is to use a label maker and print your labels. IF you go that route, you can swap the color coding categorization strategy for a number system. Maybe boxes 1-5 are frequently accessed, 6-10 are medium frequency, and 11-15 are rarely accessed, or something like that.
Now that you’ve got your storage materials and shelving systems picked out, we can start planning the unit layout.
Choosing the Correct Storage Unit Size
Before you can create a storage unit floor plan, you’ve got to measure your storage unit dimensions. Formulating a setup that accommodates both the type of stuff you’re storing and the unique shape of your unit requires measuring the length, width, and height.
Storage units range from a small square 5×5 unit to a large and long 10×30 unit. To help you plot out your storage strategy and floor map, let’s take a look at the different storage unit shapes and sizes and common use cases for each.
| Unit Size | Square Footage | Suitable For | Capacity Description | Example Items Stored |
|---|---|---|---|---|
| 5×5 | 25 sq. ft. | Individuals needing a little extra space | Similar to a small closet, ideal for limited items | Seasonal decorations, sports gear, small furniture, holiday yard decor, and several moving boxes |
| 5×10 | 50 sq. ft. | Small apartment dwellers, temporary transitions | Size of a large walk-in closet, fits contents from a studio or small apartment | Queen-size mattress, sofa, bike, chairs, 10-15 medium boxes |
| 5×15 | 75 sq. ft. | One-bedroom apartment contents, college dorm storage, and small business inventory | Equivalent to a small bedroom, fits more furniture than a 5×10 with room for boxes | Bedroom set, dresser, dining table, couch, washer/dryer, 15-25 medium boxes |
| 10×10 | 100 sq. ft. | Households looking to store two-bedroom apartment contents | Half of a standard garage fits a significant amount of household items | Large furniture sets, major appliances, 10-20 moving boxes or totes |
| 10×15 | 150 sq. ft. | Families needing to store contents from a small house for a move or during remodels | Comparable to a compact car garage, suitable for several large items and furniture | King-size mattress, living room set, motorcycle, large tools, and appliances |
| 10×20 | 200 sq. ft. | Ideal for storing vehicles along with household goods or business inventory | Standard one-car garage size, offers ample space for mixed storage needs | One car, multiple bedrooms’ worth of furniture, appliances, 80-100 boxes |
| 10×25 | 250 sq. ft. | Large households, businesses needing extensive storage, vehicle storage with extra space | Larger than a standard garage, accommodates both vehicles and substantial household contents | Two cars or one large vehicle, full household furniture, and business inventory |
| 10×30 | 300 sq. ft. | Businesses and large households undergo major transitions like relocation or downsizing. RV and boat storage. | Spacious enough for vehicle storage, whole house contents, and commercial inventory | Full household furnishings, commercial equipment, large appliances, a vehicle, extensive boxes, and inventory |
It’s important to find a storage unit that has enough space to organize and maintain your storage unit layout, with extra space for a walkway, and to move stuff around as needed. That said, the larger the unit, the more expensive it is. If you go too big, you’re paying for storage space you’re not using.
Pricing varies based on region and amenities, but you can check out our average storage unit price guide for some pretty accurate storage unit price estimates.
How To Organize Your Storage Unit Floor Plan and Layout Strategy
Some storage facilities will provide you with a map of the unit, while others will just give you the measurements. Still, we suggest going to the empty unit while it’s still empty so you can visualize the floor plan. While you’re there, go ahead and sweep the unit out and give it a wipe down or mop while you’re at it.
Once you have a physical map of the dimensions and a mental image of the unit established in person, you can start planning your layout and mapping the floor plan on paper. That said, we suggest deciding where you want your access path while you’re there in person, looking at the unit.
- An access path functions like an aisle at the grocery store.
- Plotting a pathway out ahead of time ensures you can reach the items in the back of the unit.
- The most straightforward way to organize the unit is to plan a pathway right down the center of the unit, from the doorway to the back wall.
- Create a floor plan that puts everything either to the left or right of the central path, so you can access both sides of the unit from the center.
- Another option is to create a zig-zag path that goes from the doorway to the center of one wall, and then to the back corner of the opposite wall.
- The ideal access path for your unit depends on what you’re storing, the types of shelving units you have, and how big the unit is.
Suppose you’re reading this after you’ve already loaded some of your stuff into the unit, no worries. Simply pull everything out, clean the self-storage unit, and start visualizing your layout while the unit is empty.
You can add an extra layer of protection by laying a moisture-resistant liner or tarp on the floor, especially if you live in a humid climate.
Last Minute Storage Unit Planning Considerations
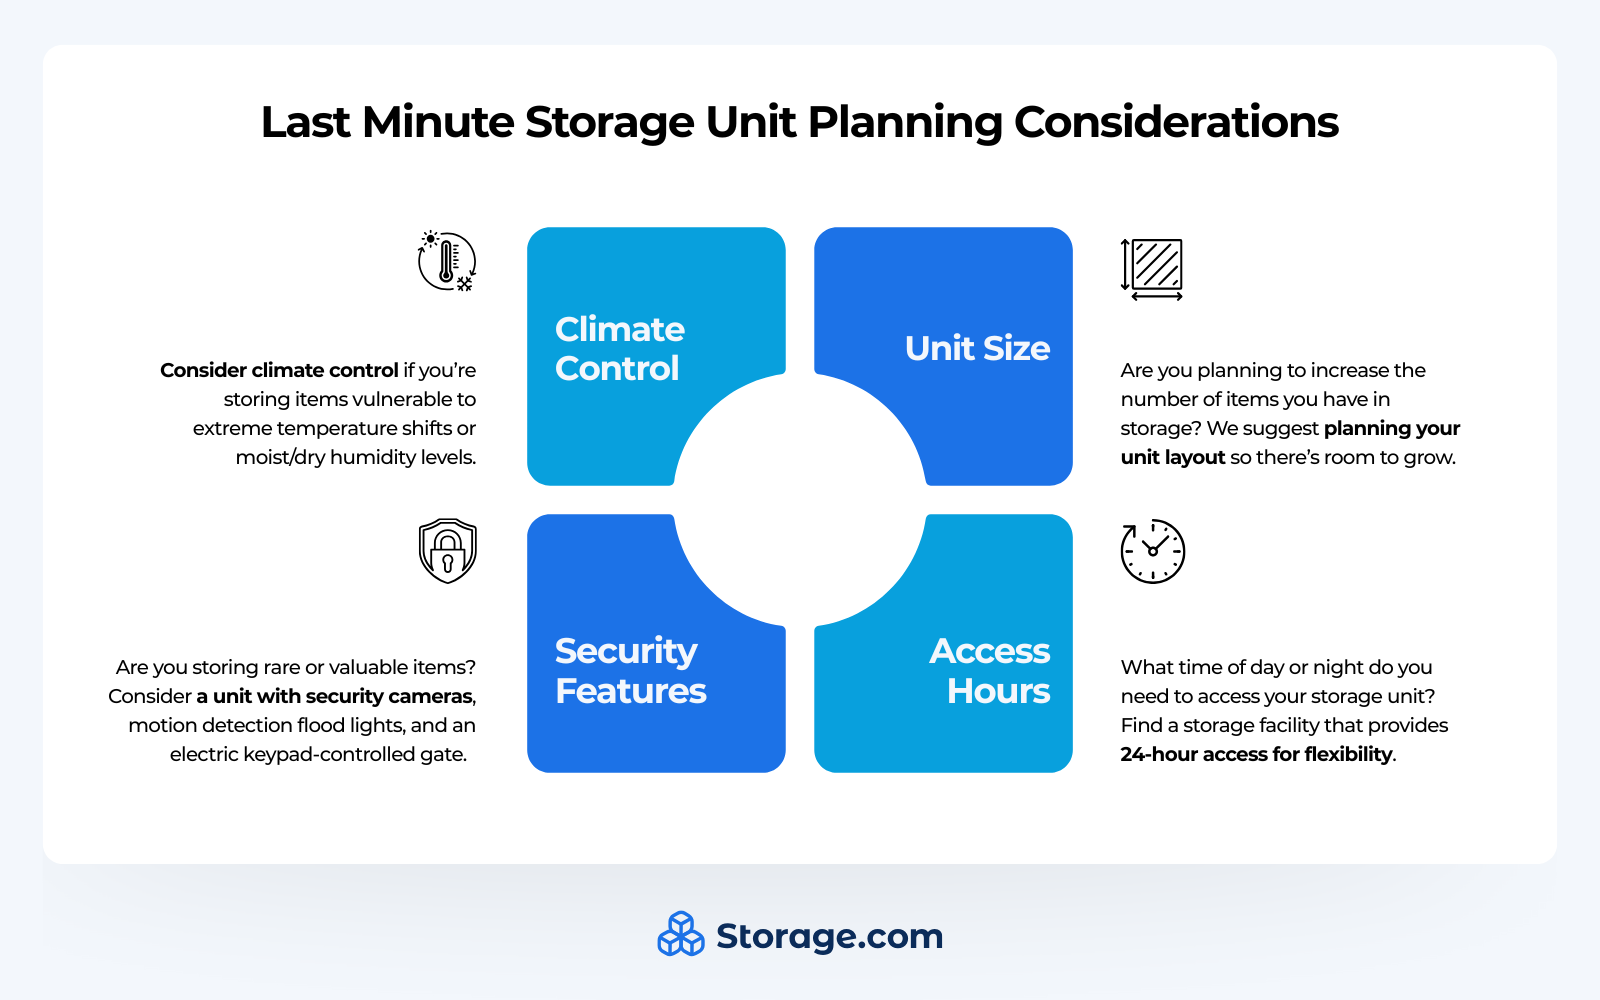
Before we move on to executing the floor plan and loading your belongings into your unit, there are a few more choices to make.
- Do you need climate-controlled storage? Climate-controlled storage units offer consistent temperatures between 55°F and 80°F (13°C to 27°C) year-round. That said, climate-controlled units offer more than just heating and air conditioning. They also offer humidity monitoring and control systems, keeping humidity and moisture levels in the ideal range of 30%-60%. Consider climate control if you’re storing items that are vulnerable to extreme temperature shifts or moist/dry humidity levels, like books, records, documents, electronics, wooden furniture, tools, vintage or delicate clothing, antiques, or musical instruments.
- Are you planning to increase the number of items you have in storage? If you’re using your storage unit for your furniture restoration business, book collection, cosplay, or theater wardrobe, or landscaping company tools, and plan on expanding whatever collection is being stored therein, we suggest you plan ahead. While swapping for a larger unit is pretty straightforward, cross-loading and reorganizing take time and energy. We suggest planning your unit layout so there’s room to grow. Say you’re storing two zero-turn lawn mowers now but plan on expanding your landscaping clientele and adding a third by the end of the year. Or maybe your record collection is at 200 vinyls, but you aim to add another hundred in the next few months. We suggest planning a layout that considers your near-future goals and provides extra shelf or floor space you can use to expand your operation.
- Are you storing rare or valuable items? Storage facilities vary in the amount of security amenities they offer. If you’re storing jewelry or rare motorcycle frames you’re in the process of rebuilding, you probably want a unit that’s protected by security cameras, motion detection flood lights, and an electric keypad-controlled gate requiring a code to enter.
- What time of day or night do you need to access your storage unit? If you’re storing hunting equipment and fishing gear and you’re an early riser who likes to hit the lake or preserve at 4 in the morning, a storage unit that opens at 9 am and closes at 8 pm isn’t the right fit. You’ll want to find a storage facility that provides 24-hour access to your unit, and then lay out your unit based on easy access to the gear you grab most frequently.
We’ll talk more about how to find the ideal storage unit for your needs in the final section. But for now, we can just say that before you commit to a unit, be sure you know what you need. Then, you can use want to use our Storage.com online search tool to find a unit with all the features you require.
How To Pack a Storage Unit for Maximum Efficiency

Now that you have your storage strategy and accessories picked out and the storage unit floor map laid out, it’s time to start putting your plan into action. We’ll start with proper packing techniques for commonly stored items. Proper preparation and packing streamline your strategizing once you get your pack up good to the unit.
Storage Prep and Packing Techniques
A successful storage plan starts with proper packing. We already discussed strategy in terms of inventory and access frequency. Now let’s see how to pack and prepare for storage.
You may be tempted to try a few different storage container designs to see what fits, but stacking boxes that don’t match risks damaging the contents and trashing your carefully laid out storage unit.
We suggest buying uniform plastic boxes that are made for stacking and interlocking together. We always go for the clear plastic containers so you can see what’s in it at a glance without having to dig through the contents.
While access frequency is the first step we considered earlier, there’s a bit more to consider when planning out what items will go together in which bin. For example, weight distribution is a crucial factor.
It’s safer to keep heavy items alone in small boxes than to load a large box full of heavy items, for the sake of transporting and for safe stacking. And conversely, we suggest loading as many small and light items into a large box that will fit. Your goal should be to end up with packed bins that all weigh around the same amount for safe stacking.
Fill as much space in each bin as possible to prevent the plastic from cracking, crushing, or caving in where there isn’t any resistance. Even stuffing empty spaces with towels or bubble wrap is safer than leaving empty space.
Finally, you want to employ proper sealing. Again, we like the clear plastic containers that come with clamp-locking lids. Don’t overstuff them, or the lids won’t lock on the way they’re designed to. Regardless of the type of container, be sure it’s sealed, even if you’re sealing it with tape.
Prepping Furniture For Storage

There are some items you obviously can’t store in boxes or bins, such as new or antique furniture. Let’s take a quick look at how to store furniture in ways that protect these larger items while also maximizing your storage space.
- Start by disassembling furniture when you can.
- Once you disassemble furniture, you can be more creative with your storage solutions.
- Avoid stacking furniture pieces on their sides and on top of one another.
- Instead, slip your headboard or disassembled chair behind a shelving unit, or strap them standing up against a wall.
- Don’t wrap your furniture in plastic packing materials like plastic wrap or even bubble wrap, as it will trap wood-damaging moisture inside that can lead to mildew and mold growth.
- Instead, wrap your furniture in breathable moving blankets or soft fabric as a protective barrier to prevent dings from contact.
- You can use a small amount of tape to hold the moving blankets in place, but be sure the tape is only attached to the blanket itself and never on the furniture piece.
Storage professionals typically suggest utilizing the storage space inside furniture. You can fit smaller items inside dresser drawers, for example. You can even get creative and slip in some compartment dividers for extra organization.
Prepping Specialty Items for Storage
Before we move into how to implement those organizational strategies, let’s take a quick look at how to prepare specialty items like appliances, electronics, clothing, and art for storage.
- Electronics: When it comes to storing electronics, back up any data or files stored on them elsewhere, turn them off, and remove the batteries. Clean the device and wrap it in a breathable microfiber cloth or canvas that won’t scratch any screens. Refrain from storing them wrapped in plastic, which can trap moisture and damage the electronic device. Store electronics in a climate-controlled storage unit.
- Appliances: Unplug your appliances before you prep them. Remove any liquid, glass, or fragile components. Put baking soda inside appliances like ovens, refrigerators, and microwaves. Baking soda helps to absorb moisture and prevent odors and rust from forming. Like electronics, appliances last much longer when stored in climate-controlled units.
- Clothing, linens, and fabric: Prep your clothing and linens for storage by washing and thoroughly drying them, and then folding them to prevent wrinkles, creases, and tears in the fabric. Avoid cardboard boxes, which attract both moisture and pests. Instead, we suggest plastic bins with silica gel packets, cedar balls, or other anti-moth moisture absorbers. You can save space in your clothing containers and add additional protection by compressing your clothing and lines in vacuum-sealed bags.
- Documents, books, and paper items: Prep your books for storage by cleaning them with a soft, dry brush. We suggest putting loose documents into a binder or folder before you store them. Slip the book or folder in a dust jacket and organize them into large plastic totes with moisture absorbers. Paper items are another great candidate for a climate-controlled storage unit, as humidity levels outside the 30% to 50% range and temperatures over 70 degrees will age any paper. Too dry, and the paper gets brittle; too humid, and mildew grows.
- Artwork: To prep your artwork for storage, clean your artwork with a soft, microfiber cloth to remove dust and unseen dirt. Slip a sheet of acid-free paper over the display side of a painting, and wrap it in breathable, soft cotton or canvas. Avoid plastic bubble wrap that will trap moisture against the paper, unless the artwork is sealed in a glass frame. Store the artwork in an acid-free container; not just any old plastic container will do. All artwork should be kept in a climate-controlled unit. Valuable artwork should be stored in a storage facility that has extra security features, like cameras and keypad-controlled gates.
Storage Unit Organization Strategy and Layout Methods

Now that you’ve got your floor plan fleshed out and your items prepped and packed for storage, it’s time to put your plan into action and lay out your unit.
Take Advantage of Vertical Space
For starters, you want to maximize your storage unit’s capacity by taking advantage of the vertical space. The average unit is between 8 and 10 feet tall. Those uniform storage containers we suggested earlier will come in handy when it comes time for stacking boxes. Always keep the heavier boxes on the bottom and the lighter boxes on top.
You can maximize your storage space even more by installing shelving units against the walls. We suggest either metal-framed wire shelving or sturdy, adjustable plastic shelves. If you can fit it, we suggest two shelving units: one for large loose items and one for stacking plastic bins.
- When you’re stacking boxes to the ceiling on top of one another, you have to remove all the boxes until you get to the one you need to access, or else the stack comes tumbling down.
- Stacking your bins on shelves lets you pull the container you need out, be it in the middle or on the bottom, without toppling the stack.
- Shelving units also give you more leeway with how you pack your boxes, as you don’t have to worry about them cracking or caving in.
You can utilize wall space by installing hooks or strapping large flat items against it. Take advantage of any ceiling space that isn’t touched by shelves by installing ceiling hooks or nets and storing items way up high.
Use an S-hook to hang a ladder or stool on the side of your wire shelving units so you can reach the ceiling and top shelf items with ease.
Zone Your Storage Space
You can make life easier for your future self by creating themed storage areas or zones. Remember the inventory sheet and room layout you created in the planning stage of this guide? You can revisit it now and decide which items and bins should go where on your map.
For example, you can have a seasonal zone, where you put your rock climbing gear in the wintertime and your ski equipment in the summer.
If you’re sharing a storage unit with family members, friends, or a roommate, you can give each person their own zone to respect each other’s space, and so you’re not tripping all over each other when you’re in the unit at the same time.
Another way to create zones is by item popularity. Remember when we charted out those access aisles? Time to put them to use.
- You want to maintain access to your most frequently used items by keeping them at an easily reachable height near the door of the unit. Frequently accessed items could be in their zone.
- But also give yourself access to the back and top of the unit by creating pathways and optimizing the storage unit’s traffic flow.
Regardless of how you zone your storage space, creating dedicated zones ensures you put things back in the same place every time and know exactly where to find them when you need them again.
Advanced Stacking Techniques and Storage Tips
Before we move on to labeling and inventory storage tips for storage units, let’s take a quick look at some last-minute stacking tricks you can try.
- Pyramid stacking for stability: Pyramid stacking is when each box on the stack is slightly smaller than the one below it, forming a stack resembling a pyramid and distributing weight for extra stability.
- Interlocking box arrangements: With an interlocking box arrangement, you’re positioning multiple stacks of boxes together so that their edges support one another, preventing sliding and shifting while also saving space.
- Using furniture as storage platforms: Dresser and table surfaces are a great place to stack boxes on top of, or to use as platforms to elevate crates of vinyl records or comic books.
Labeling and Inventory Management Storage Tips for Storage Units

Now that our storage unit is set up efficiently, let’s update our inventory management and labeling systems to make it easier to find what we need. For starters, we can update our color code strategy based on the zones we created.
Regardless of whether your color-coding is based on a category or frequency of use, using the same color tape to label every box in one zone makes it easier to find the box and to put it back in the right place when you’re done. Print out an updated inventory sheet, and highlight all the green-label box items with green, blue with blue, etc.
And while we suggest clear plastic bins as the default, some items – like photographs, whiskey, or wine – may fare better in opaque bins that block sunlight, or in the original boxes they came in. Whether you’re using clear bins or containers that are harder to see through, we always suggest you label boxes:
- Label bins twice – the top of the box and the side that faces outward from the stack.
- Use the color coding system by printing the label on colored label maker tape or writing it in a magic marker on a colored piece of tape.
- The label should include the type of items in the box (“Books”) or the room the items came from (“Upstairs Office”).
- Number each box and organize your inventory sheet so that all the items are listed under the box name and number (“#3 Books”).
You may be optimizing your inventory and packing strategy as you organize your unit and inventory list, which is great. Just take the time you need to take everything out of each box and adjust your inventory and labeling system as needed.
Once you’ve got your analog list finalized, color code it, print it out, laminate it, and keep it on a clipboard attached to a shelving unit by string or chain. Keep your storage insurance paperwork on the same clipboard for reference.
Next, it’s time to create a digital backup of your master list and layout map:
- Take a picture of every labeled bin.
- Make a master list of all the items inside the bin.
- Build a spreadsheet of all the contents of every bin.
- Create a map of the storage unit.
- Color code each zone of the map to correspond with the bin label colors in that zone.
- Write the number of each bin on the map to show where it goes.
Now you’ve got your own cheat sheet you can access on the fly. And if you’re sharing your storage unit with others, or if you need to send a friend to grab something on your behalf, you can link them to the digital master list and diagram, and they can find what you need them to in no time.
Maintenance and Long-Term Storage Unit Organization
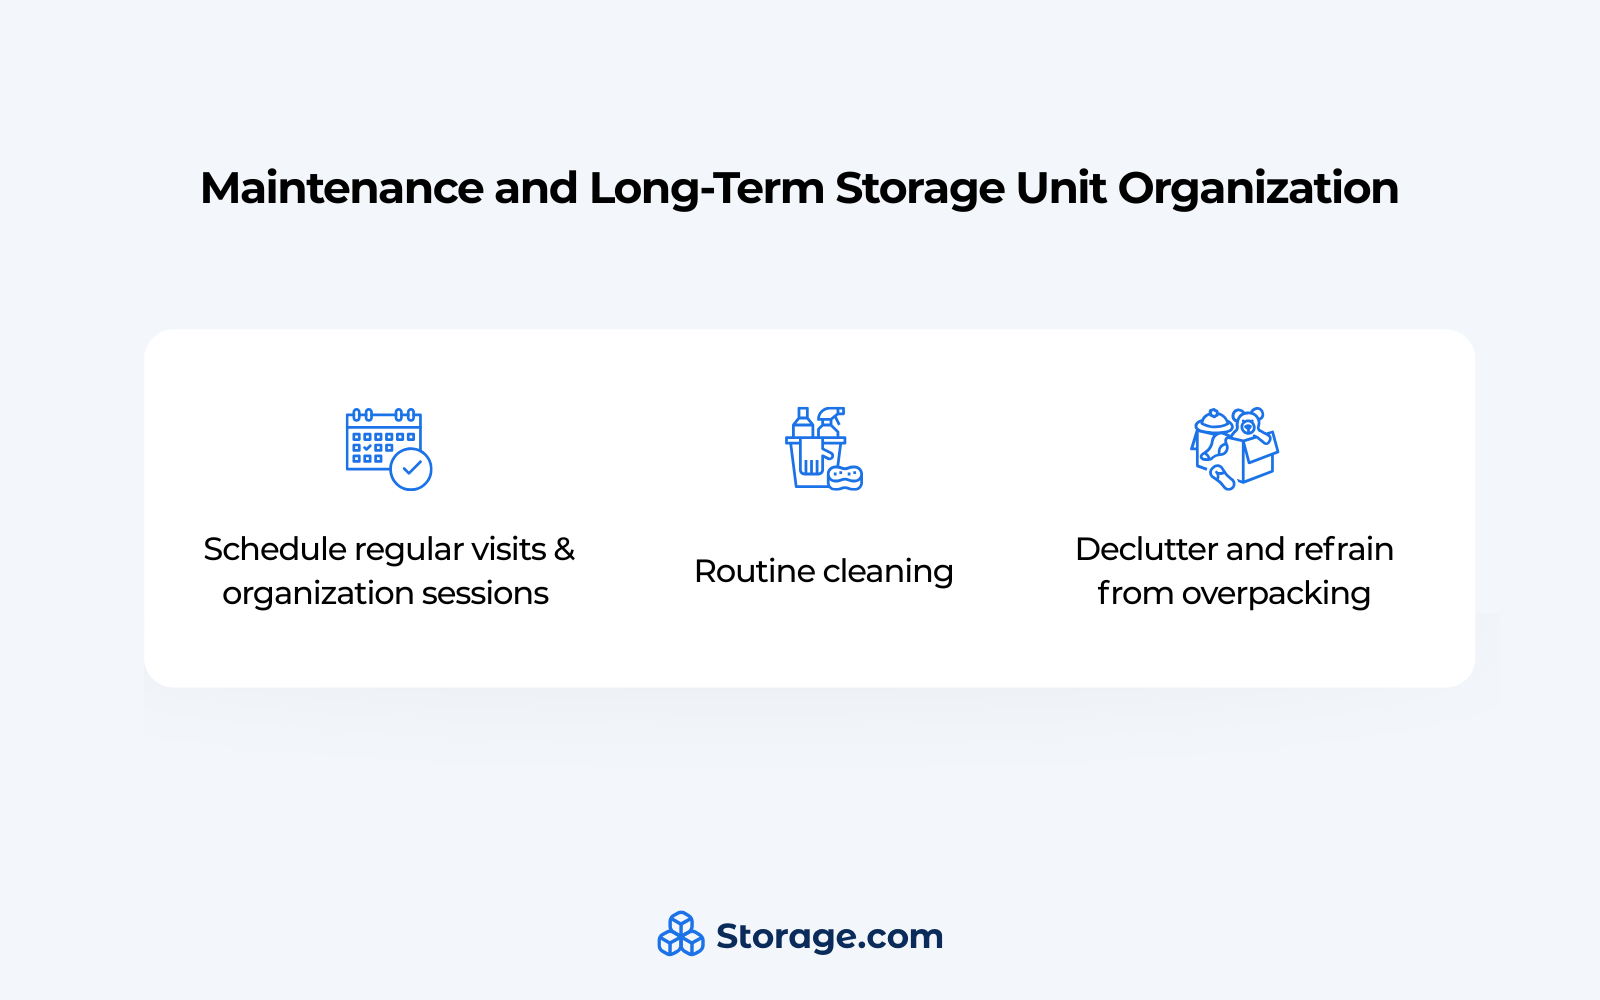
Now that you’ve got your belongings prepped and properly packed, your storage unit organized for accessibility and efficiency, and your inventory management system in place, it’s time to set up a maintenance routine.
It’s important to update your inventory system when you swap out seasonal items, for example. And if you add new items in, you need to find a home for them and update your map and inventory sheet.
Let’s take a detailed look at how to organize a storage unit for the long run.
Schedule Regular Self-Storage Unit Organization Sessions
We suggest scheduling a quarterly storage space upkeep session once every three months, at the start of each season. This allows you to swap your winter clothing and sports gear for your spring gear, for example, and to update your inventory list and maps while you’re at it.
You should be returning things to the proper place every time you use them, but this seasonal upkeep session gives you a chance to go through everything and make sure iit’sin the right place.
And if there are any items you haven’t used for over a year, consider donating or selling them.
Routine Cleaning
In addition to inventory updates and seasonal swap-outs, these quarterly updates give you an opportunity to do some storage unit cleaning.
Sweep the floor, dust off all the shelves, change the oil on any landscaping or power tools, and sharpen any blades. Check all your bins to ensure they’re staying moisture and pest-free, and swap out your old moisture absorbers for fresh ones.
Declutter and Refrain from Overpacking
We’re obviously all about teaching you storage tips for storage units to maximize space, but overpacking your bins – or your unit – isn’t one of them. Not only can stuffing your storage containers full damage fragile items, but it also makes it hard to keep track of what’s in each bin.
And overpopulating your storage unit with items is a fast track to losing walkway space. Besides, your storage space needs air circulation.
- Overcrowding your self-storage unit can leave your goods smelling musty and collecting moisture, even if the space is dehumidified.
- Always leave breathing room in your unit, especially around delicate items susceptible to damage from humidity or heat.
If you find your storage unit is getting cluttered and hard to manage, it may be time to upgrade to a larger unit. If that’s not in the cards for you, try switching to the one-in-one-out rule.
Every time you bring something new into the unit for storage, you remove something of a similar size. You can bring it home, donate it, or try to sell it.
In the next section, we’ll tell you the secret to finding the ideal storage unit in your area. First, let’s look at a few more common self-storage unit mistakes to avoid:
- Overpacking boxes beyond their safe weight limits
- Blocking access to your belongings
- Poor stacking leading to crushed or fallen bins and damaged contents
- Inadequate security features or protection for valuable items
- Forgetting to update your inventory records and layout map
How To Organize A Storage Unit Using Storage.com
By now, you should have a pretty good idea of how to organize a storage unit like a pro. It all starts with a planning session before you pack to save time and space.
Take advantage of the unit’s vertical space even during the mapping and planning stage. Use proper labeling and an updated inventory system, and plot out access pathways to find what you need quickly and efficiently. And conduct seasonal maintenance and cleaning sessions to keep things streamlined, safe, and up to date.
That said, all the proper packing techniques and storage unit organization methods can’t help you if the storage unit itself lacks the amenities you need.
For example, if the items you’re storing are sensitive to humidity or temperature fluctuations, the need for climate-controlled storage might be a non-negotiable. Mildew and mold can threaten even the most organized and systemized storage unit contents.
And i your storage unit doesn’t provide 24-hour access and you need to grab gym equipment, fishing gear, or a bicycle early in the morning or late at night, it’s a matter of time before you get frustrated and stop paying attention to the unit altogether.
And what if you’re storing valuables like antique furniture, jewelry, or sensitive documents? You’ll probably want proactive pest control, security video cameras, on-site managers or security personnel, and keypad-controlled gates.
But how do you find a storage unit that has all the amenities you need?
Don’t fret – Storage.com is here to help.
Storage.com lets you browse and compare self-storage units using amenity filters that isolate the storage facilities in your area with all the ideal storage features your needs.
Just punch your zip code into our handy Storage.com search tool, and you’ll see what we mean.
We’ll filter through the thousands of local storage facilities for you, making it easy to find the storage unit that best fits your needs.
Whether you’re looking for a climate-controlled storage unit with climate control, electricity, alarms, 24-hour access, drive-up access, or security cameras, Storage.com makes the process quick and painless.
All you have to do is choose a storage unit and your move-in date, and we’ll take care of the rest. And if you have any questions about storage unit organization that this guide didn’t answer, feel free to ask. Our storage representatives are just a phone call away!